The GRBLHAL2000 board is designed by Drewnabobber and is based around the powerful Teensy 4.1 microcontroller. It supports control of up to 5 axes, which in the case of the PrintNC with its ganged Y-axis allows the addition of a 4th rotary axis.
Due to covid-related component shortages, the Flexi-HAL was designed as a successor to the GRBLHAL2000 and as of 2023 is the recommended controller for a PrintNC build.
¶ Overview and pictures
The newest version of the GRBLHAL2000 is the EST (Electronics Standardization Team) revision, which includes breakout boards for Limit/Probe sensors, and User Buttons. These connect to the board via RJ45 (ethernet) cable, and make wiring up your machine much simpler.
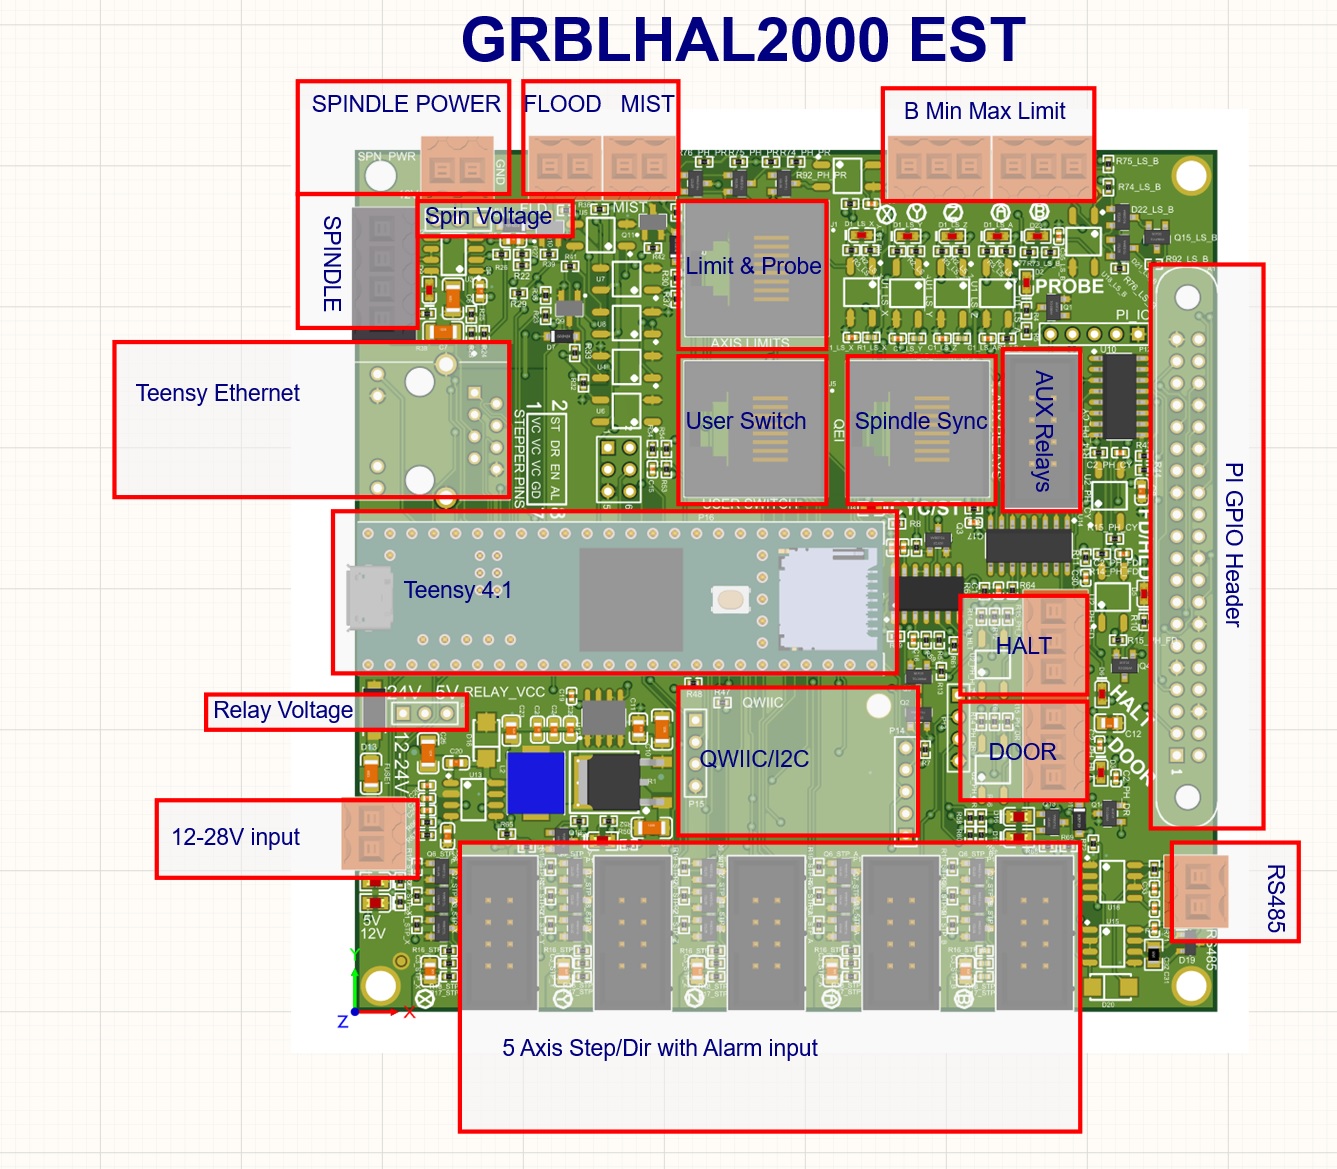
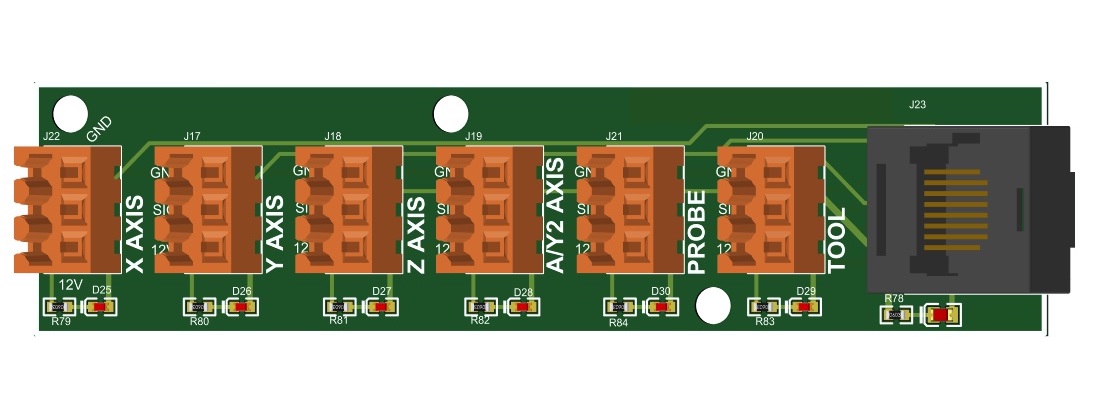
Printable case for the limit sensor breakout board is available here:

Printable case for the user button breakout board is available here:
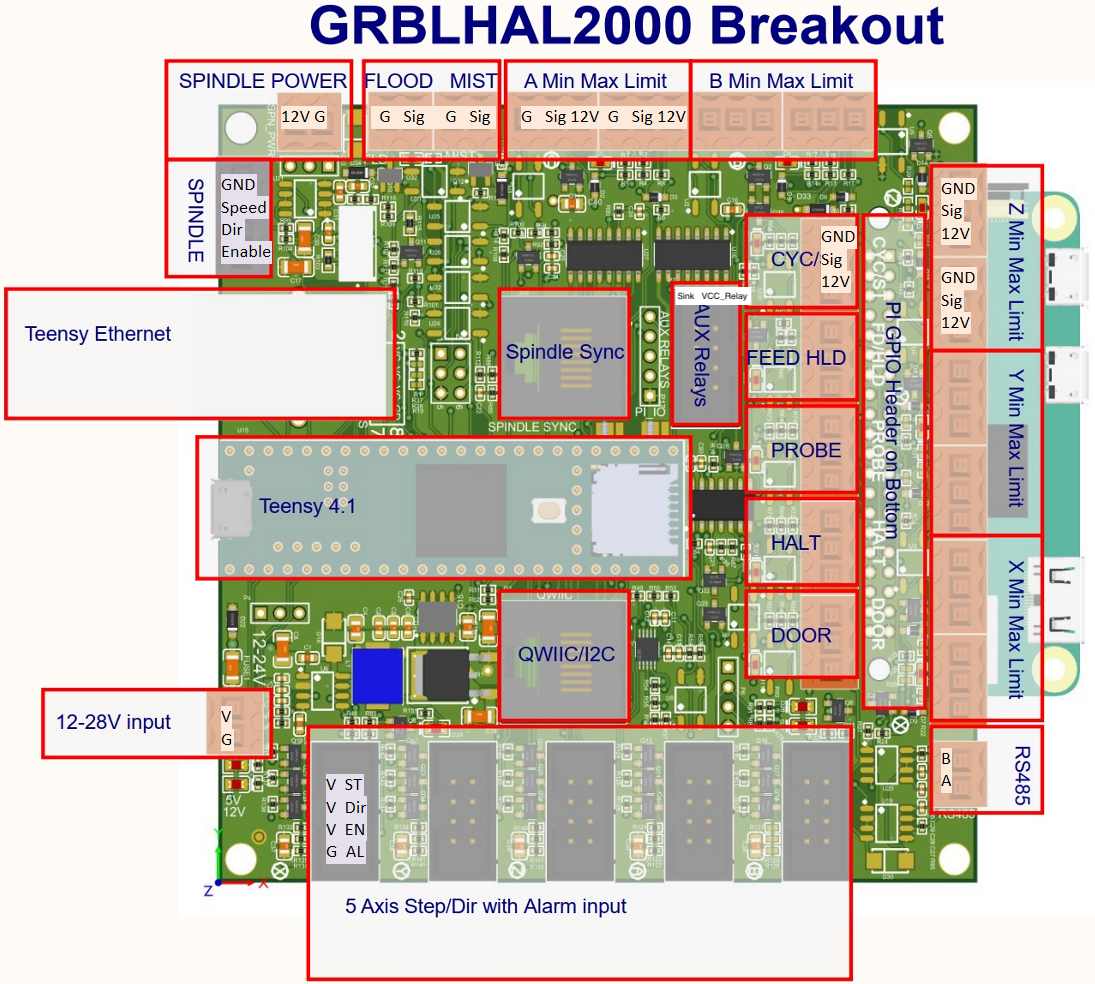
¶ Original GRBLHAL2000 Board
¶ Jog2K I2C Keypad Pendant
GRBLHAL2000 boards also support the Jog2K keypad jogger pendant [github link], which connects to the GRBLHAL2000 via USB-C and communicates over I2C. It's powered by an inexpensive Raspberry Pi Pico, features RGB LED feedback for most buttons, and a 128x64 pixel OLED screen showing DRO, work coordinate system, feed rates, machine status etc.
The Jog2K's Shift button allows access to macro functions, jogging speed and rotary axis jogging if required.
For more information, check out the Jog2K wiki page. If you would like to order a batch yourself, there are instructions on the GRBLHAL2000 PCB ordering page.
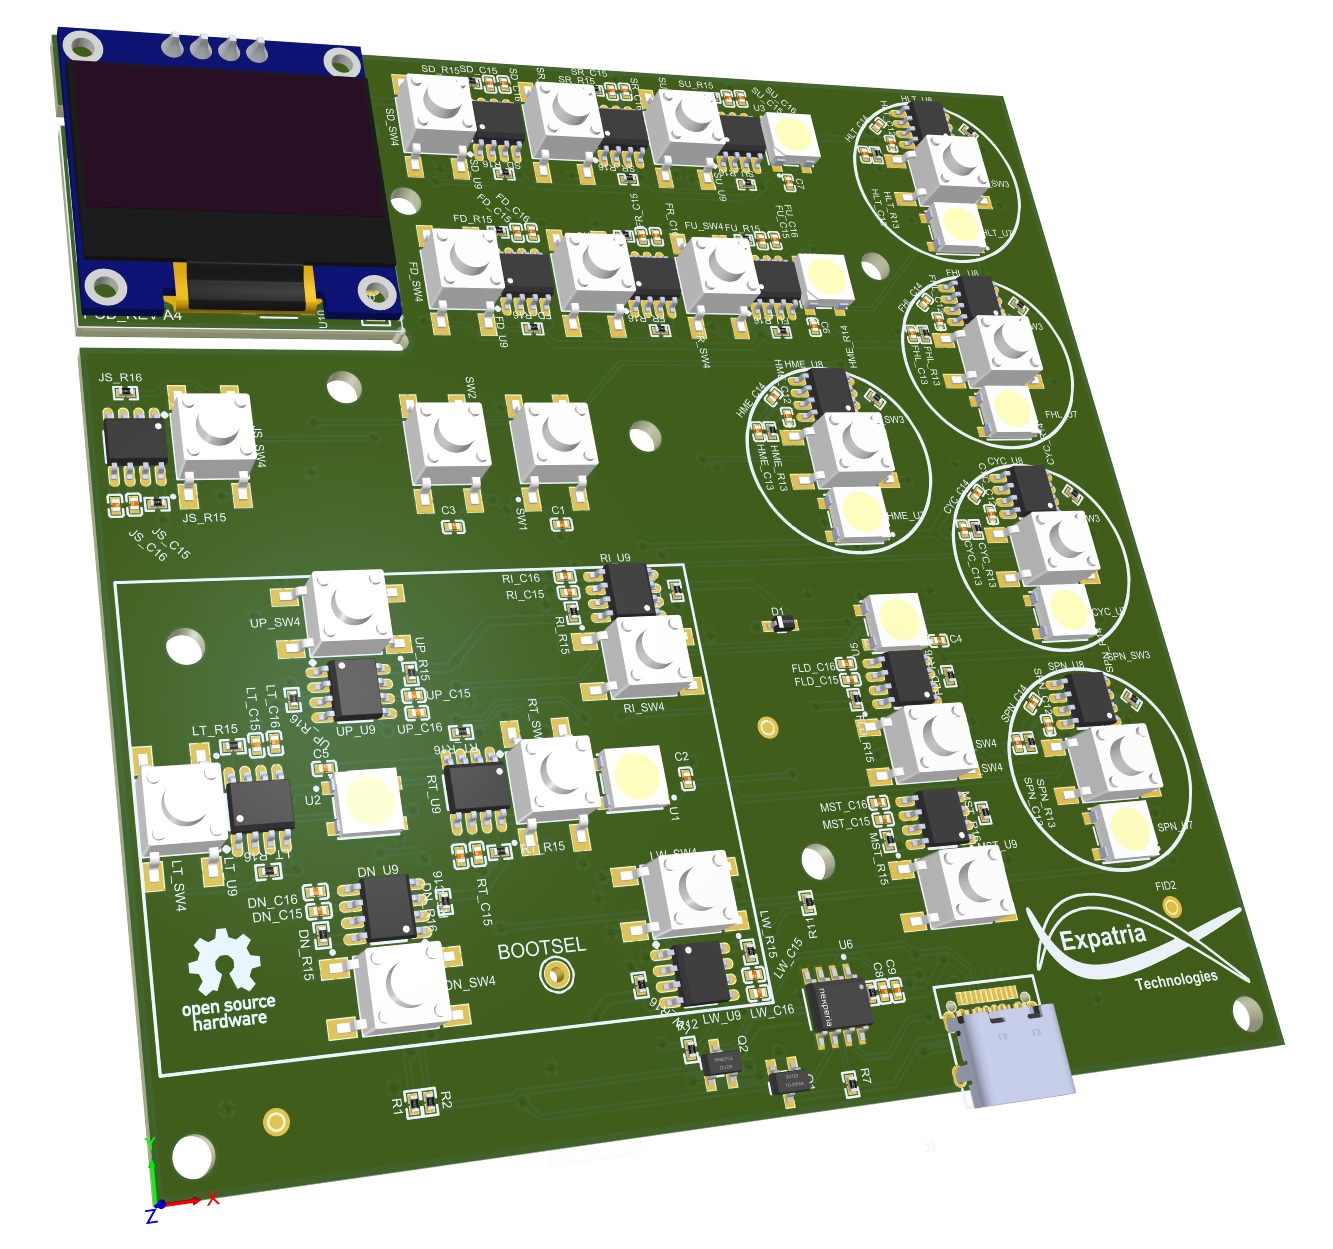
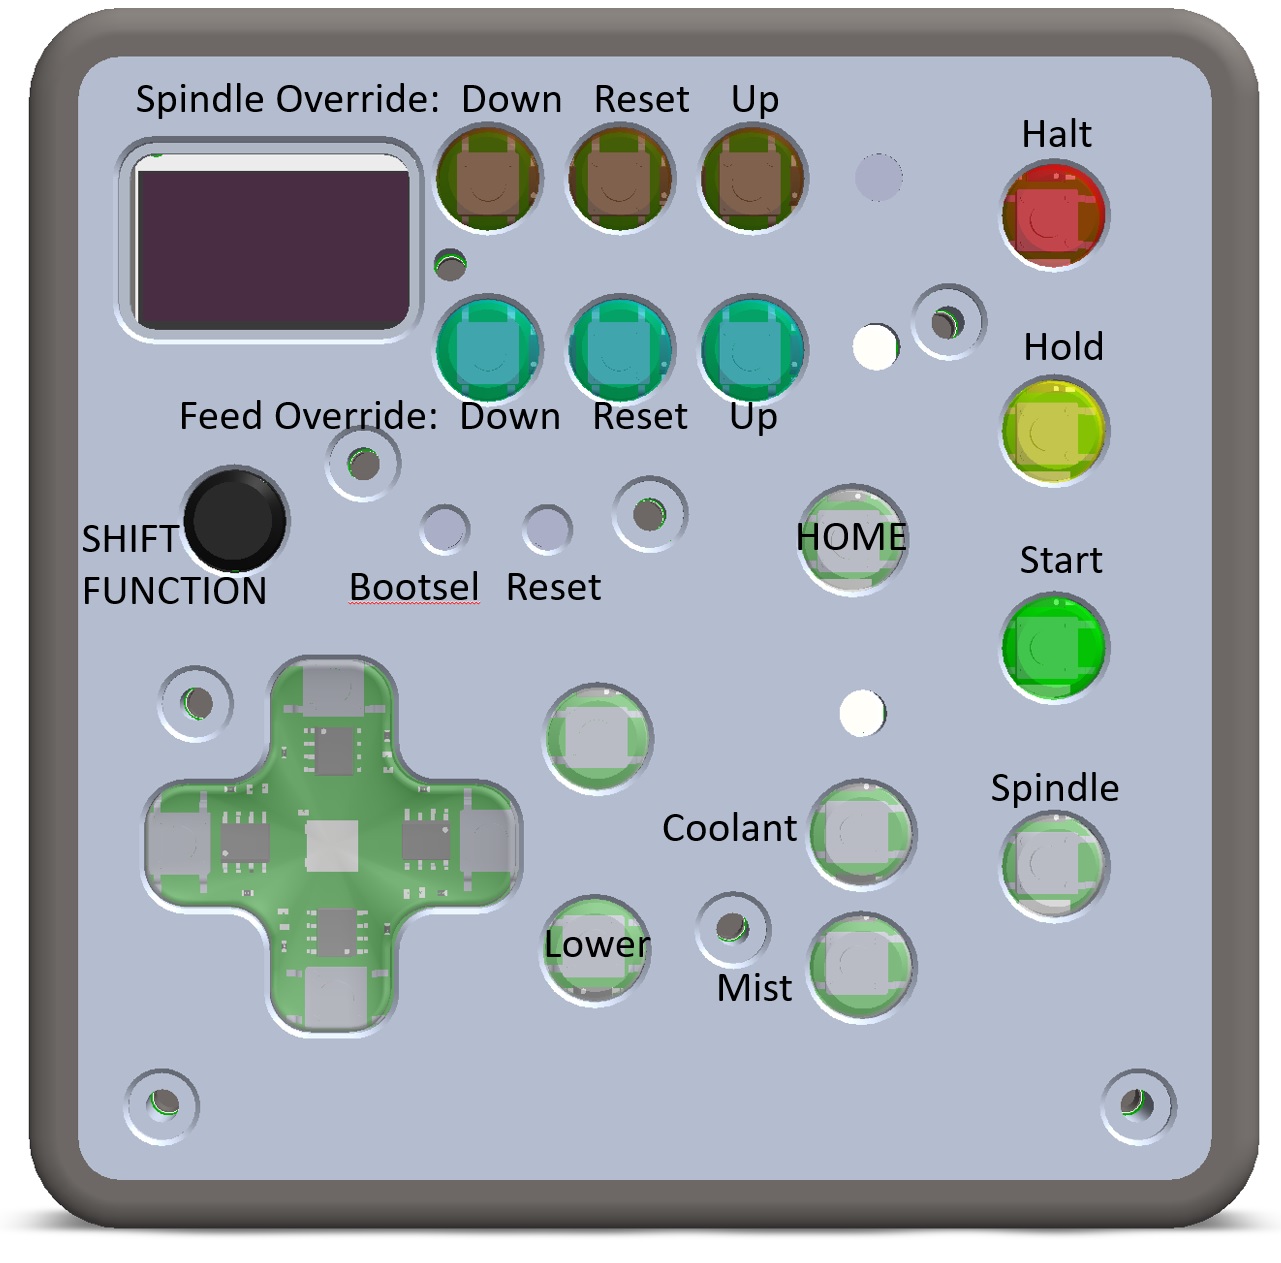
A printable case for the pendant is available here:
https://github.com/Expatria-Technologies/RT_Jog_Controller/tree/main/Jog2K%20Deluxe%20Edition
¶ Flashing Firmware
Most people with a “standard” PrintNC will want to start out with a precompiled version of the GRBLHAL2000 firmware. If this sounds like you, then visit the Flashing Firmware page.
¶ First Run Settings
The official grblHAL wiki is worth reading, especially the first run settings page.
Really though. You're probably using it to run a rather powerful machine. You should probably understand a bit about the software that controls the metal beast that's actively trying to kill you at all times. Go read some documentation.
¶ Connection
¶ GCode sender
The board can be controlled either via USB or Ethernet. Ethernet is preferred as its more resistant to electromagnetic interference (EMI). However, both cables can be connected at the same time if one so pleases.
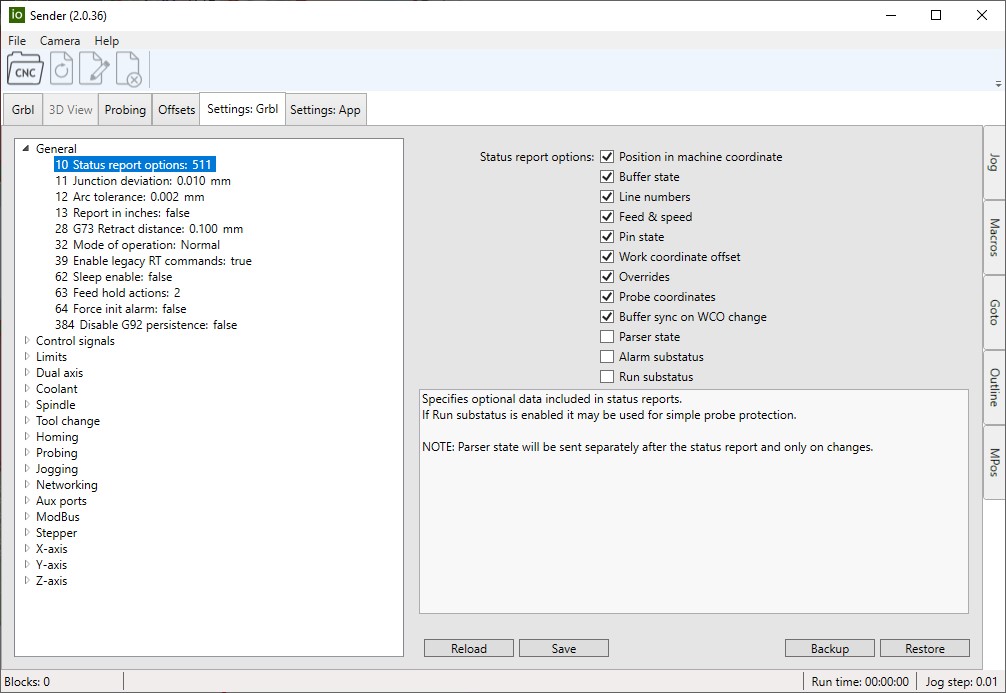
Every GCode sender supports the connection via USB, while IOSender also supports connection via Ethernet. IOSender fully supports GRBLHal and is the recommended tool for initially setting up the GRBLHal board as it provides a GUI to change settings and handy check boxes for the configuration options which would otherwise require the setting of bitfields. It might be possible that you need to connect via USB once to get the Ethernet IP address and/or change the networking settings to match your network.
¶ IO
Most IO is connected as you would expect. The user inputs (start/hold/stop/probe/door) can be connected as simple switches between GND and Signal.
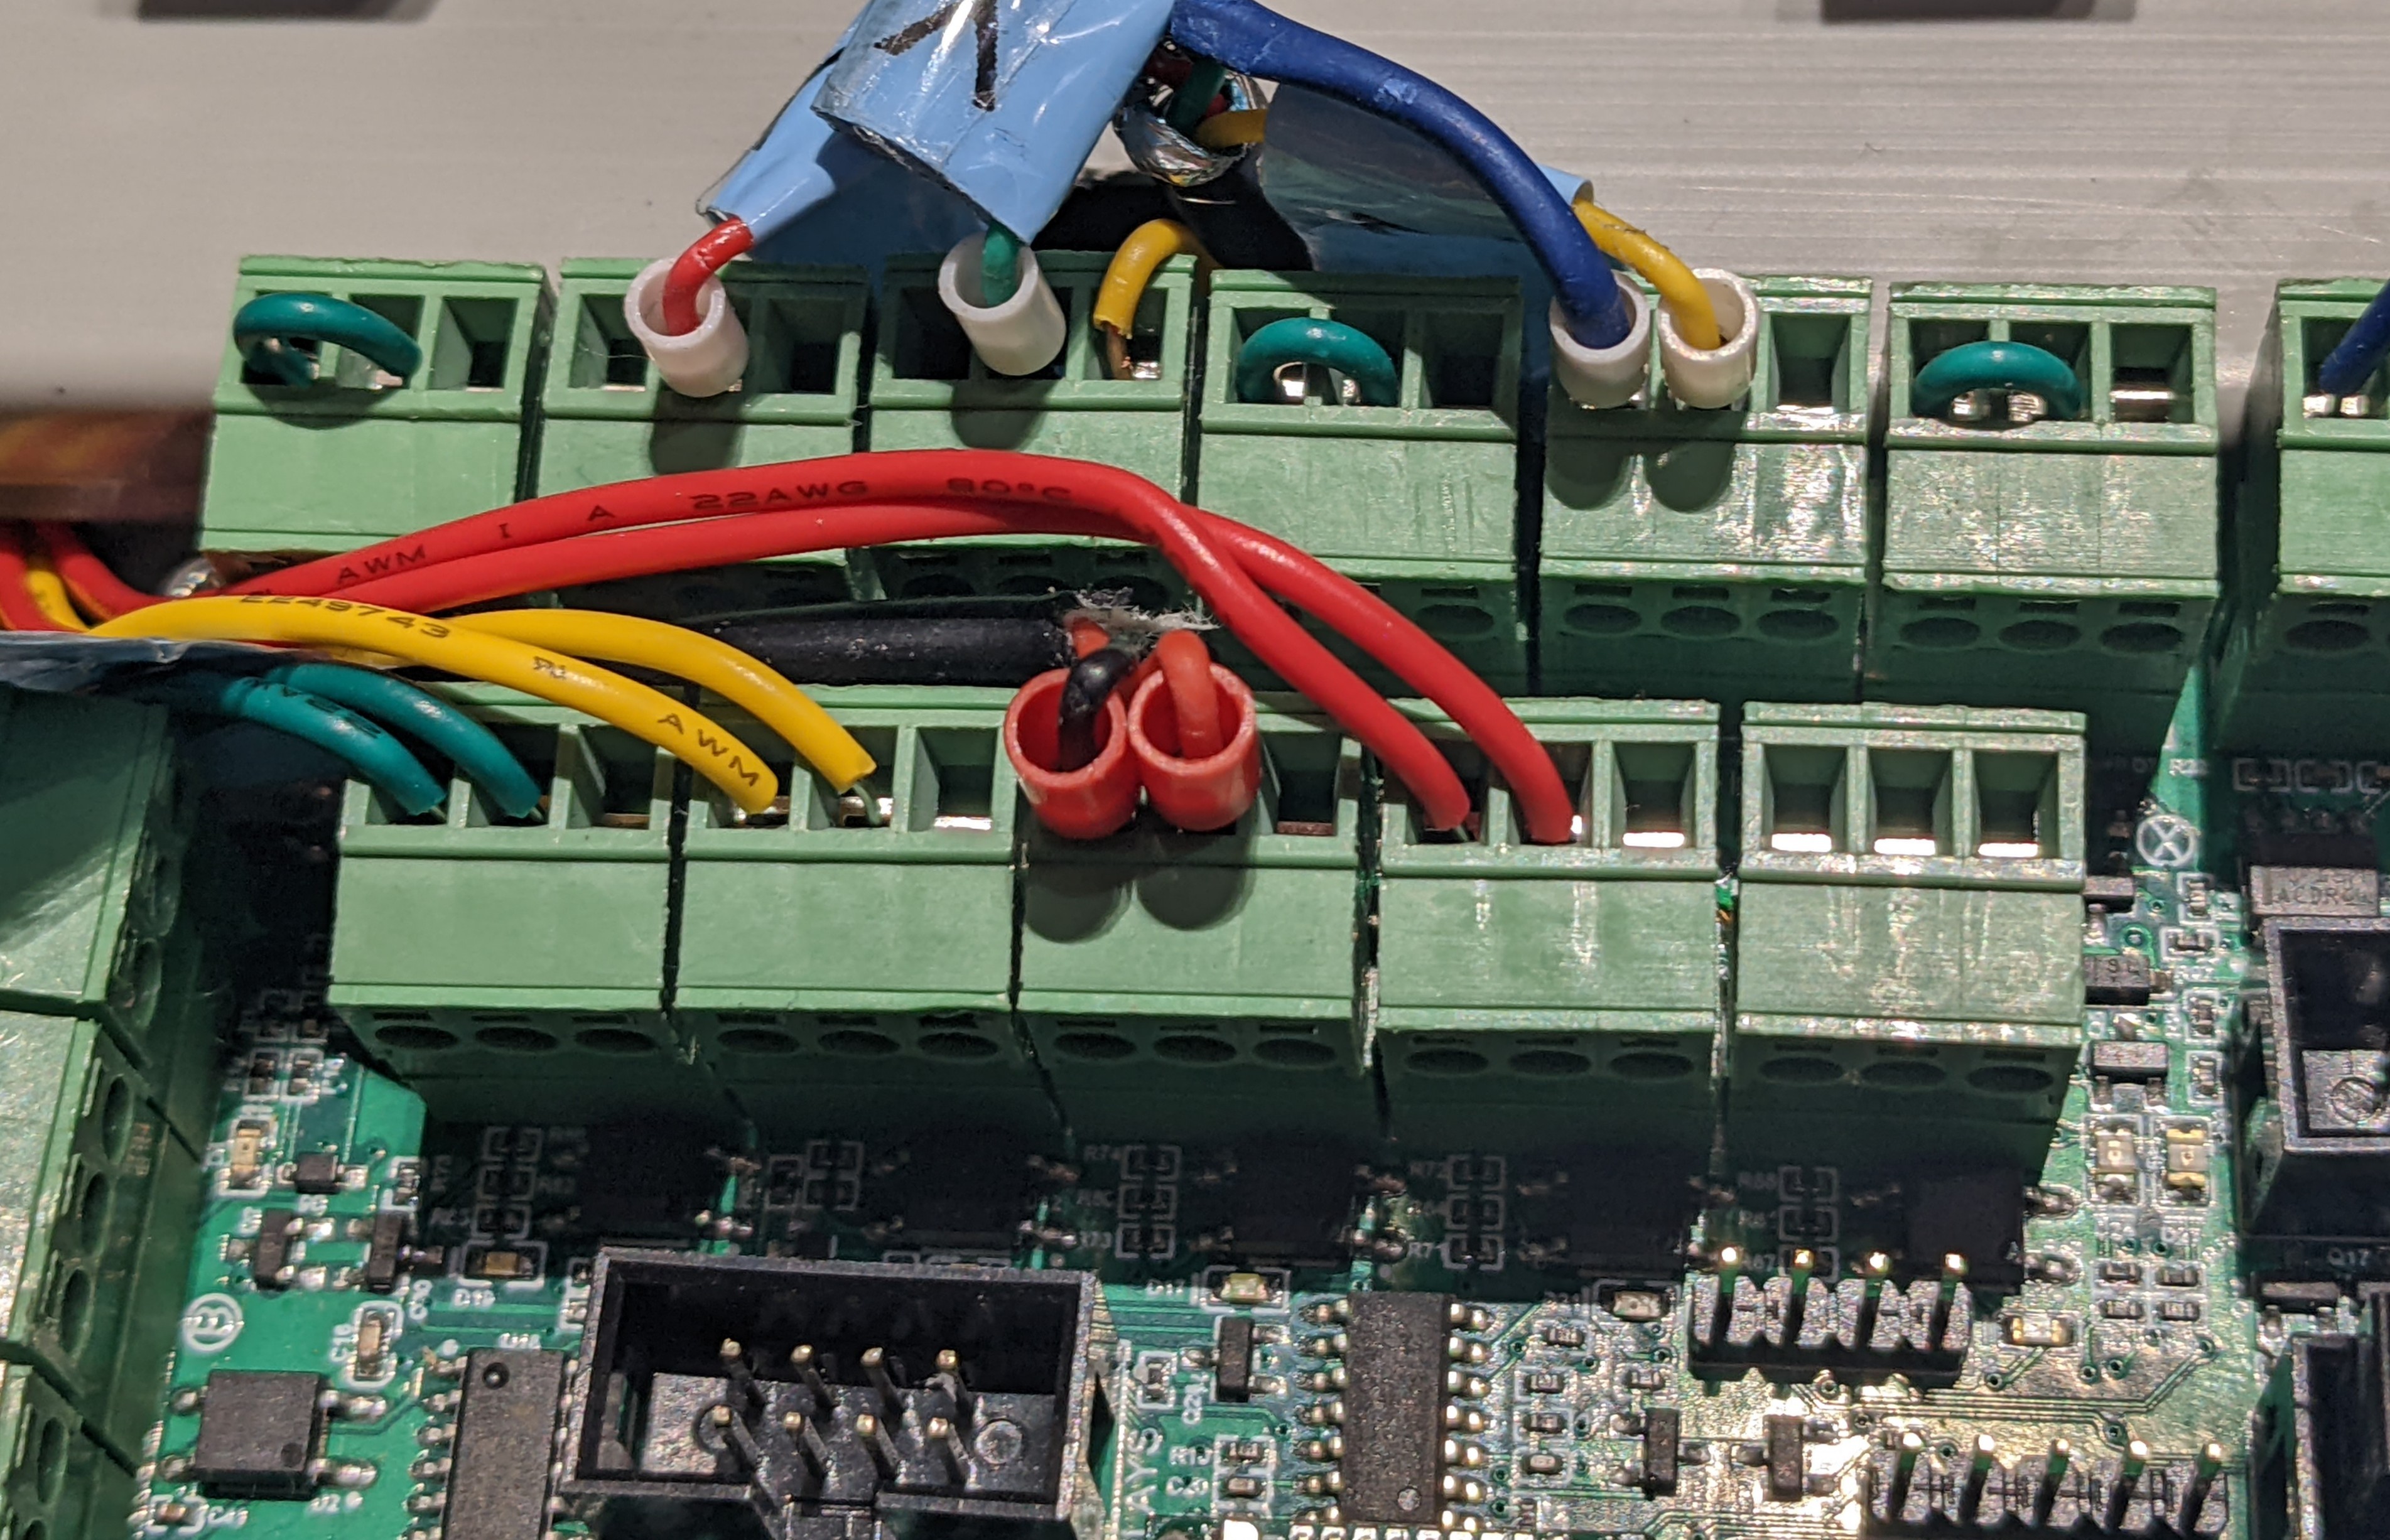
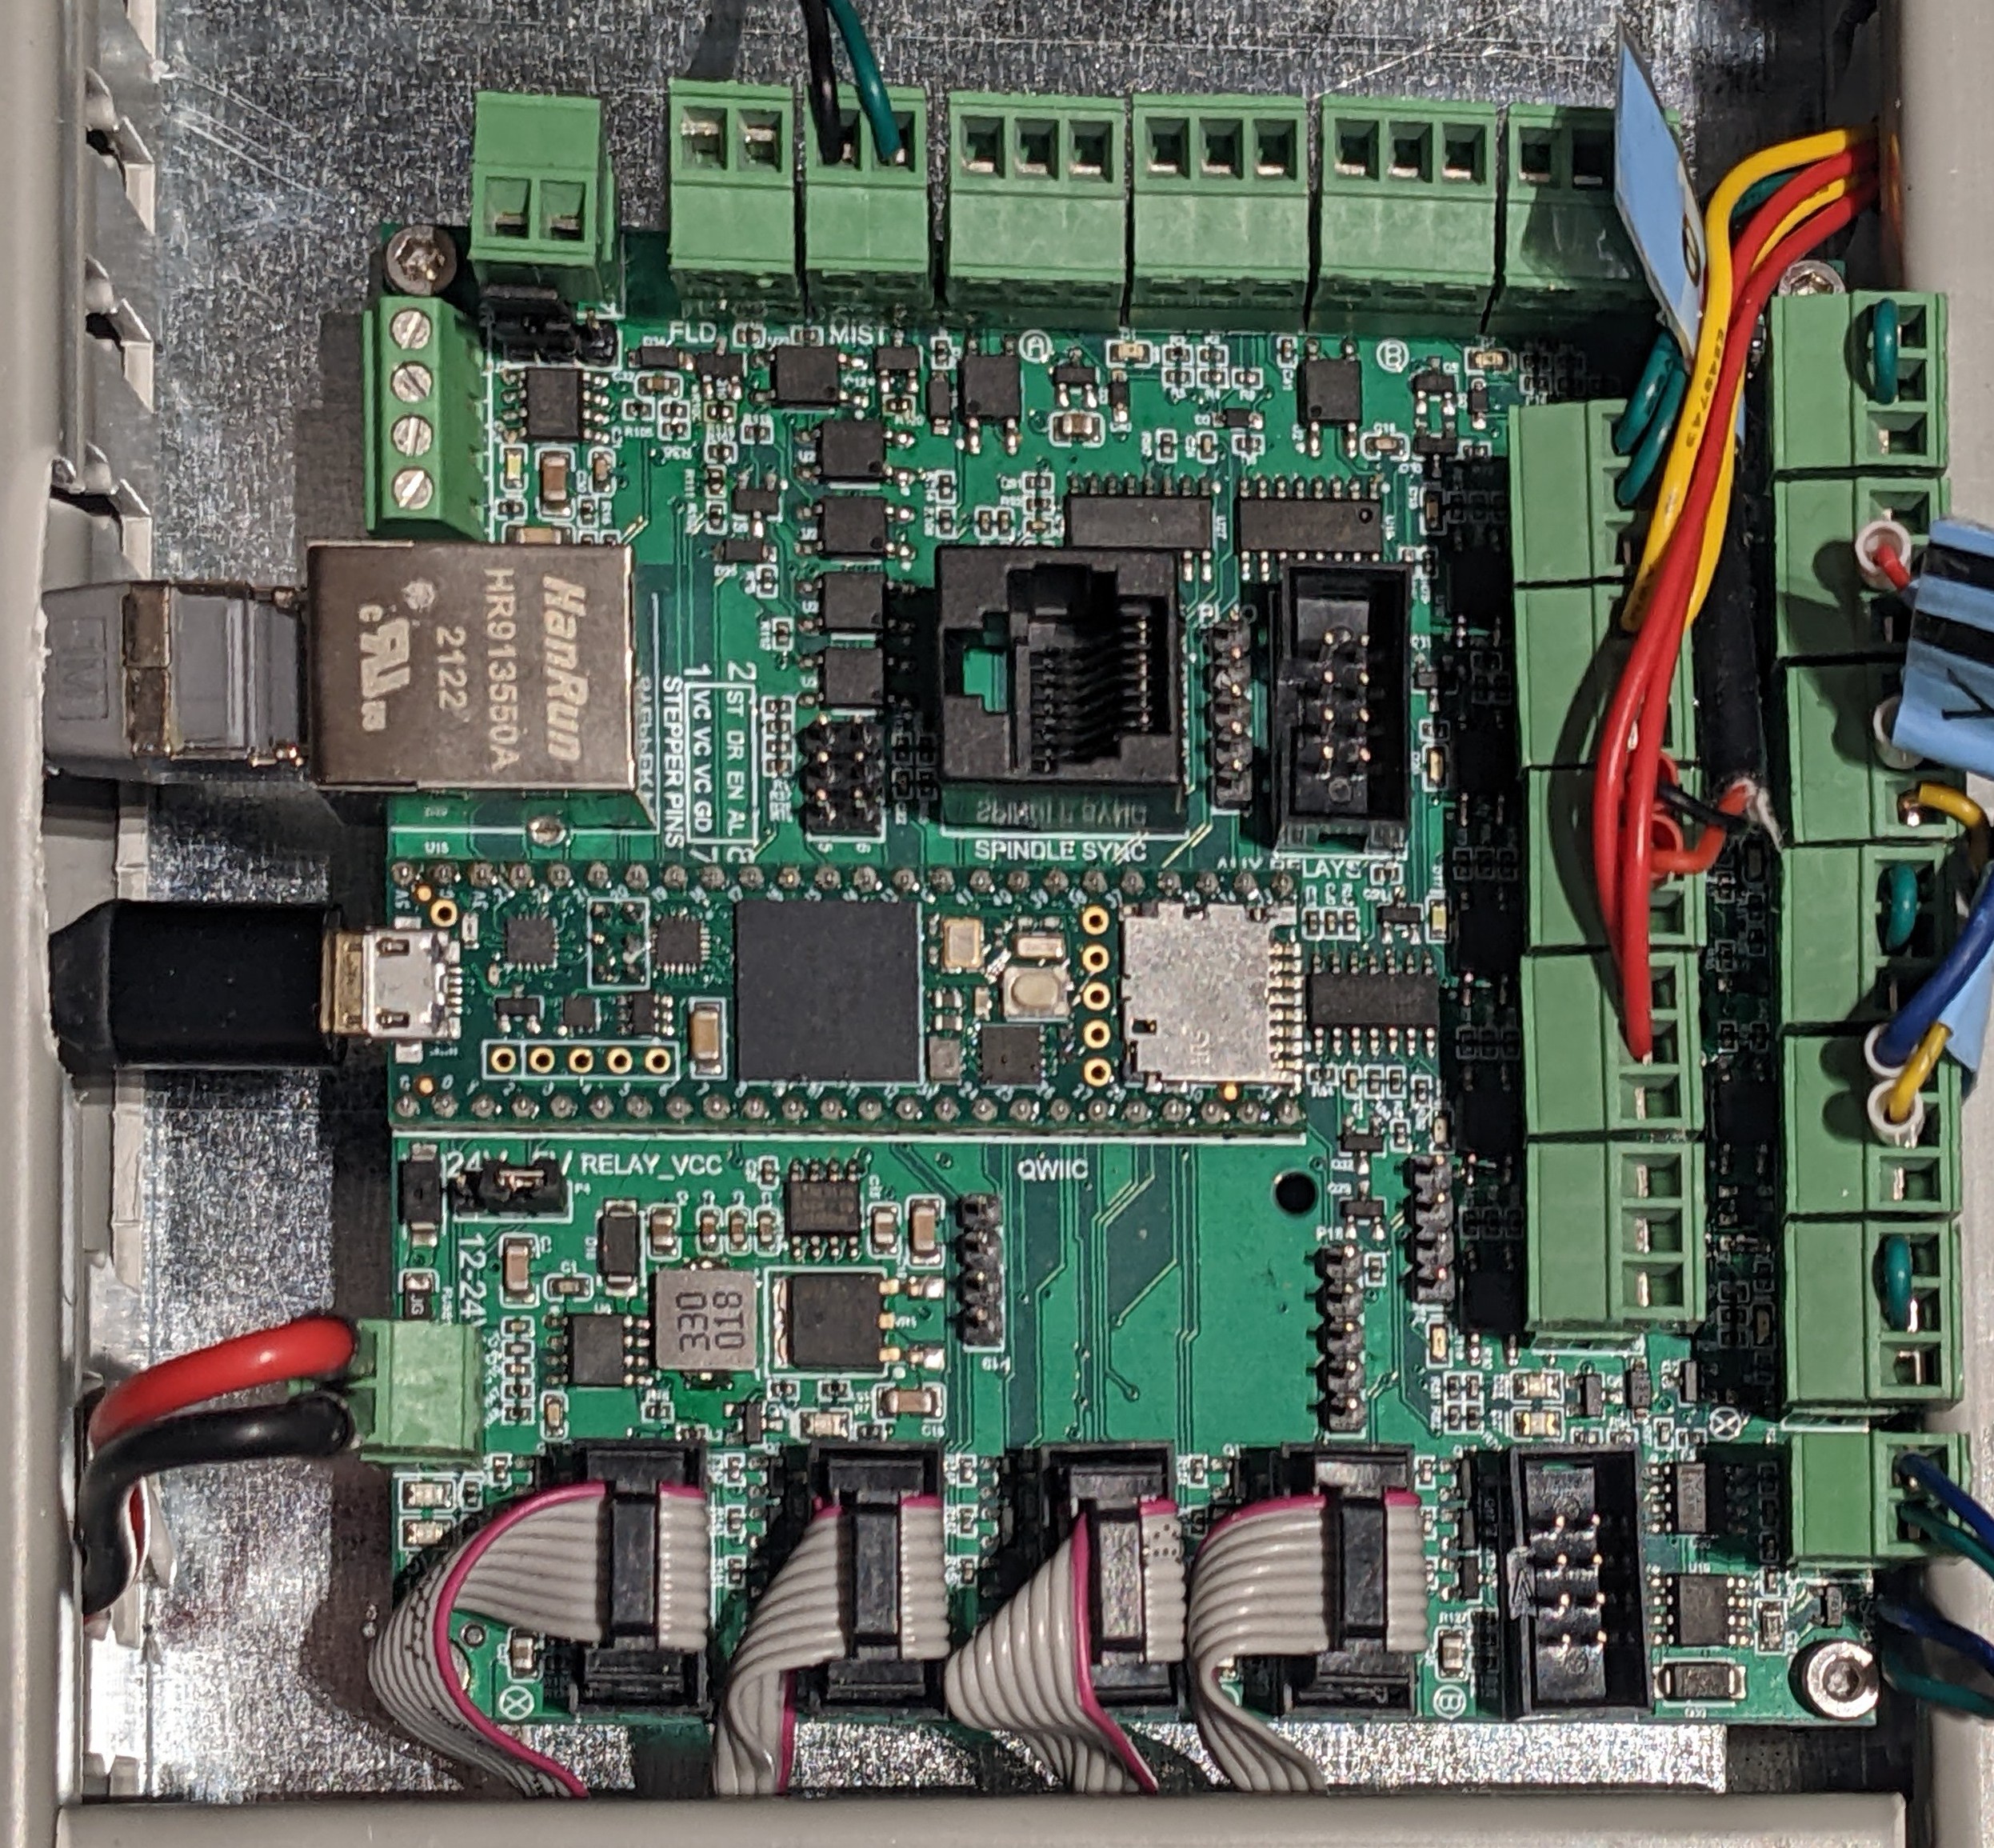
For the original (Non-EST) version of the GRBLHAL2000 board (pictured below), the end stops are also connected as sinking between GND and signal with the one caveat that there has to be something connected to all end-stops, meaning both min and max.
If you don't have both min and max end-stops you can add a jumper wire between GND and Signal on the unused ports. If you don't do this, your switches won't register state changes and won't trigger. An NC switch would be always triggered and an NO switch never triggered.
¶ Aux Outputs
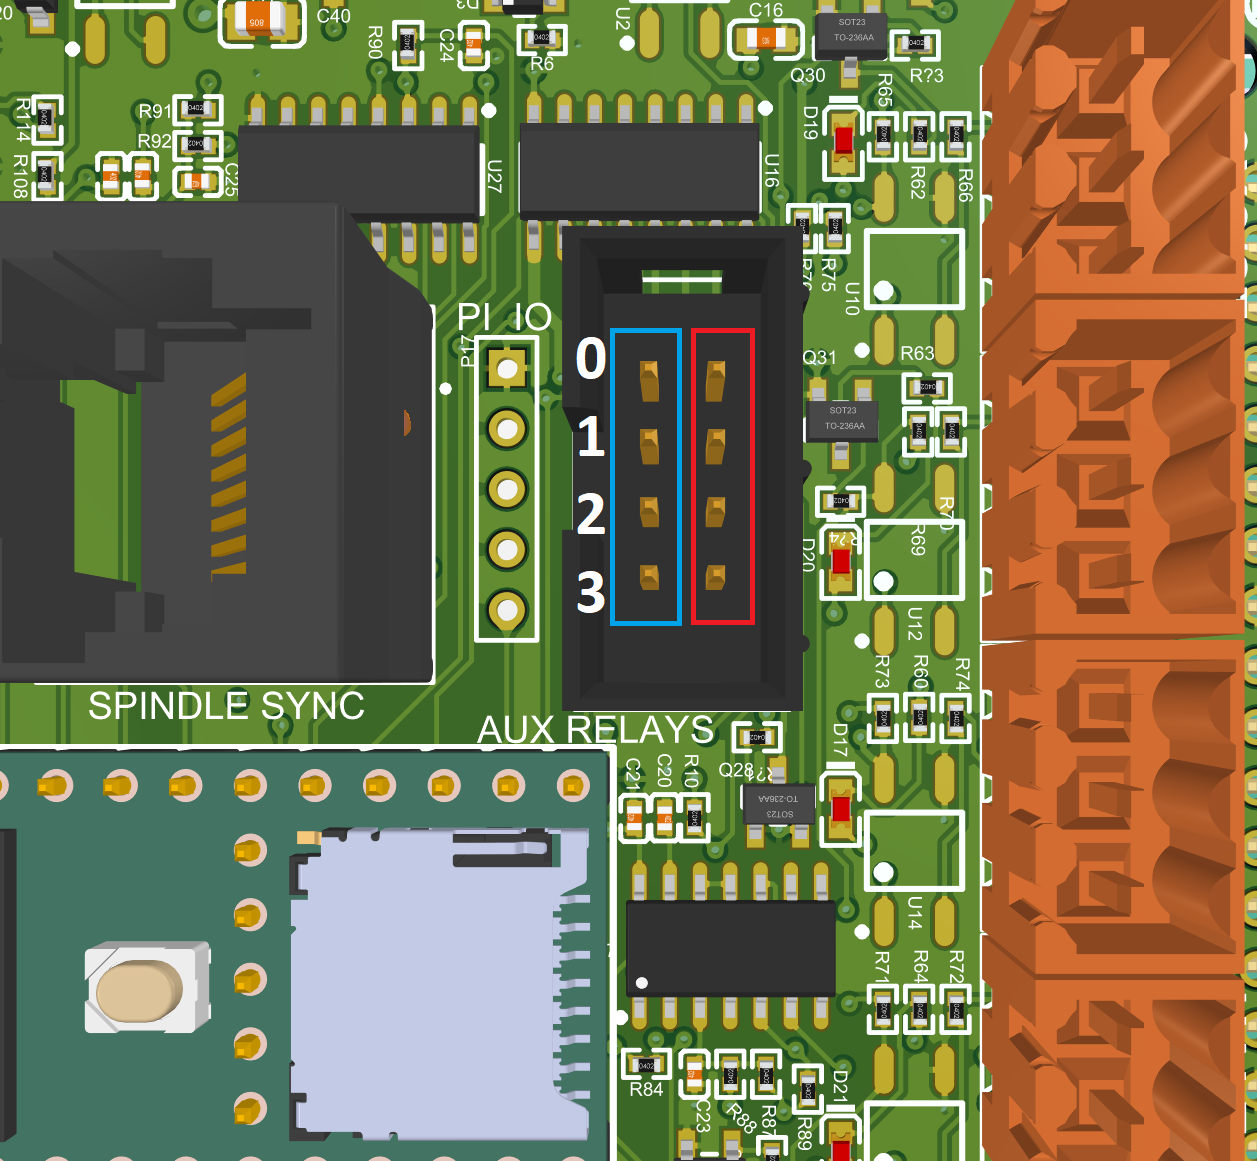
The 4 Aux outputs are wired via IDC connector. Blue pins are the active low (sinking) outputs, and red are all relay VCC.
Conductor 1 on the IDC cable is the top left pin on the below diagram.
(Note: For the GRBLHAL2000 EST revision, this connector is rotated 180º and Conductor 1 is bottom-right)
¶ Stepper Drivers
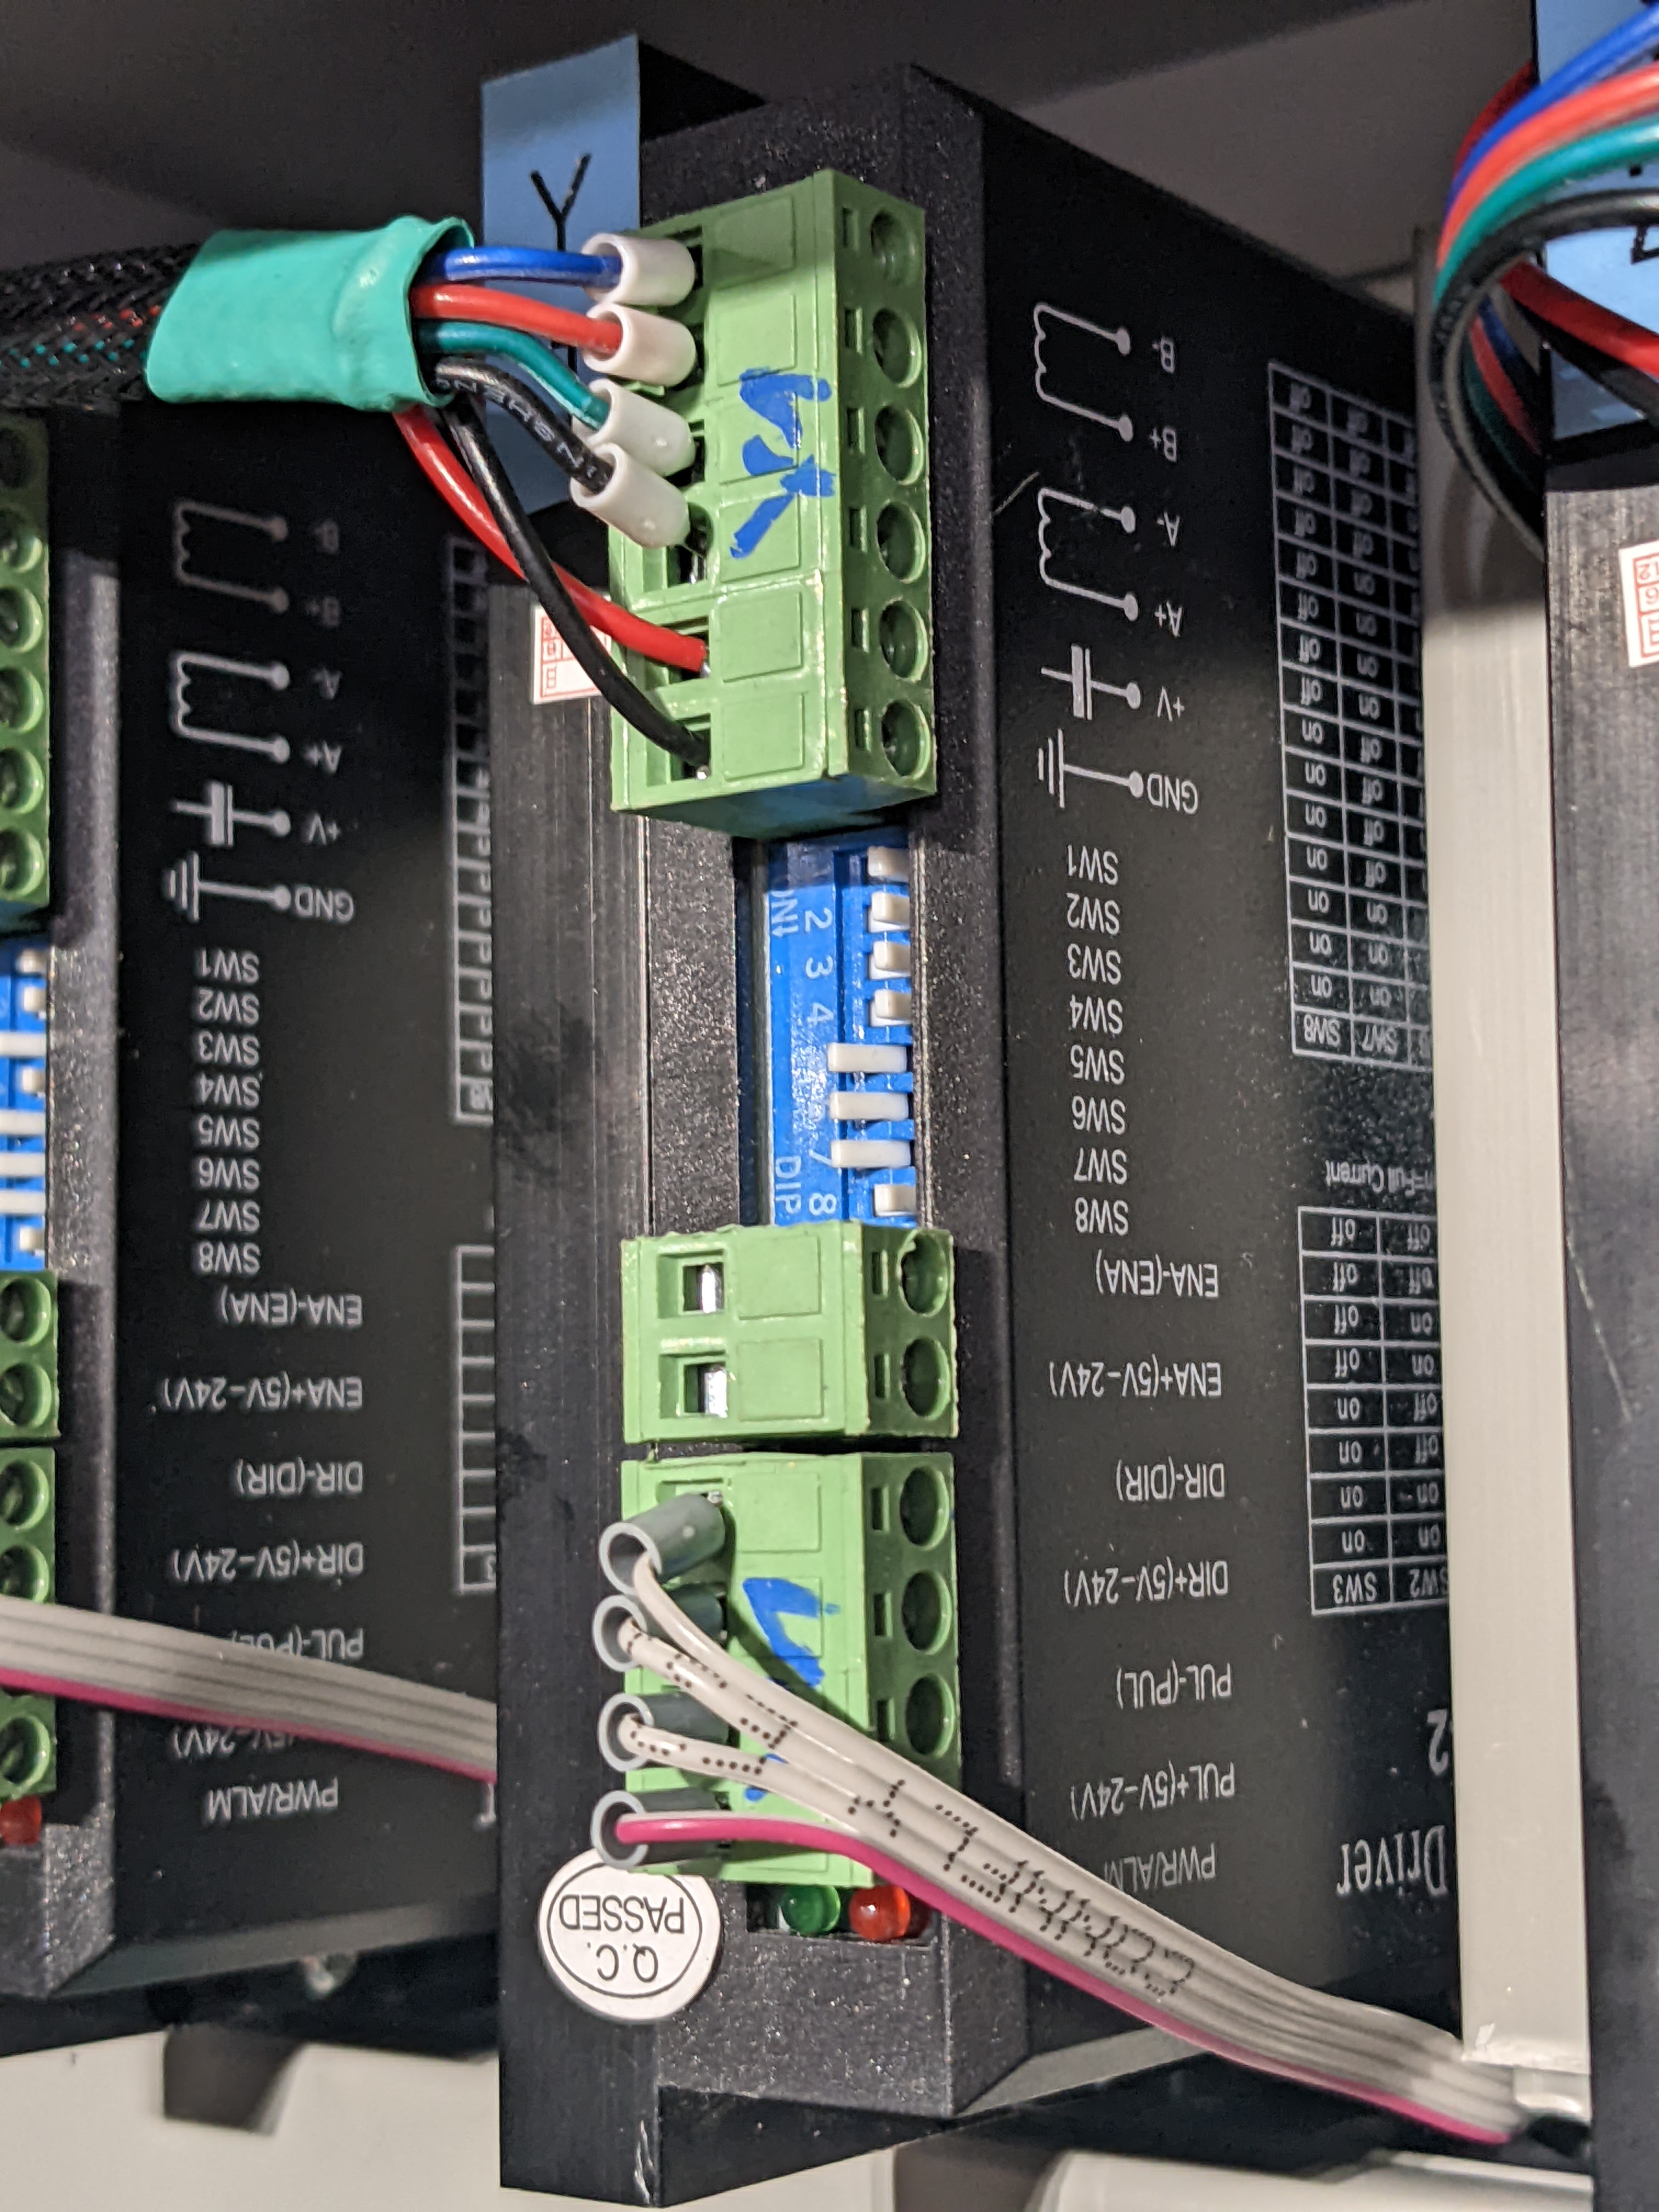
The steppers are connected via IDC 8 pin cables. Only 4 of the 8 pins are actually required. It is not usual to connect the enable pins, as it is preferred to keep the steppers enabled all the time as to not lose any steps.
The Y axis motors connect to the Y and B stepper driver IDC pin blocks. Y is Y1 and A is Y2. Similarly, the Y1 limit switch goes to the Y limit switch connector and the Y2 limit switch goes to the A limit switch connector.
Note the red marked cable on the IDC connector as a reference on how to connect the cables. (Note the orientation of the stepper driver too)
¶ LEDs
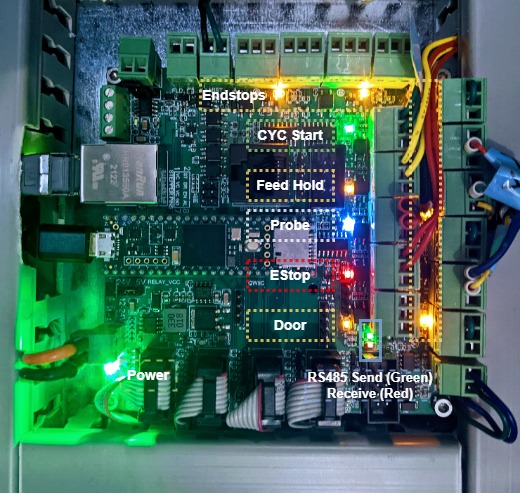
In general, the LEDs on the GRBLHAL board are on when a signal is asserted. There are yellow LEDs for end-stops, red/green for RS485, and colored LEDs for the user switches. The red (receive) and green (send) LEDs should blink when the connection to the VFD has been established.
¶ User Switches
Near each user switch is an LED that is active when the signal is asserted. The colors are detailed in the table.
| Green | Cycle Start |
| Yellow | Feed Hold |
| White | Probe |
| Red | Halt (EStop) |
| Yellow | Door |
¶ Raspberry Pi
A Raspberry Pi Zero or Pi 3+ can be connected directly via the expansion header on the underside of the board. Functionally there is not much difference to a connection via USB cable, other than eliminating a long cable that might be prone to EMI.
This allows you to extend your functionality without having to do it within grblHAL. Potential uses include tool changer work, and pendants, among anything else you can dream up. Our discord user Trader has written a little bit of python to take advantage of available USB drivers and the IR-key table stack. With this, he was able to make an IR remote for his machine and can jog it around (when cleaning mostly) without needing a laptop on hand.
The H2K can also be connected, on that header via ribbon cable, to a full-size Pi if you wanted to run a touch screen controller. The Pi has not only a serial port but also direct awareness of various alarms etc. So you can embrace and extend to your heart's content, and you're not limited by the single loop/Arduino C setup, or working inside grblHAL. If you think of the H2K as a motion controller for multi-axis robotics, instead of just a CNC controller, your imagination might dream up other possible uses.
¶ Where do I get one?
You can either check if anyone near to you has assembled a board you can buy directly from them or you can follow the guide to ordering a batch, assemble yourself and sell the additional boards.
GRBLHAL2000 Marketplace | PrintNC Wiki
Ordering a GRBLHAL2000 board from JLCPCB | PrintNC Wiki
Ask on the discord in the grblhal channel if there is no local option for you, maybe someone is planning to order a board and you can organize a group-buy.