Note: There is a v3 “beta” version of this page and can be found here: https://wiki.printnc.info/en/v3/planning
¶ Downloading Core Project Files
¶ Sizing your Build
¶ Estimated Work Area
The standard PrintNC has an approximate work area of 38"x24" (950mmx600mm). However, the design can be scaled up or down with minimal modification. The “back of the envelope” calculation is to add 400mm to the desired X and 350mm to the desired Y work area. So for a machine that does Yaxis of 1270 mm (50”) x Xaxis of 915mm (36”), it would require a machine footprint of Y – 1670 mm by X – 1265.

¶ Sizing Considerations
- the PNC is a tool. Build the tool that fits your requirements and space constraints
- larger machine = larger projects for only a small price increase.
- Think about inserting standard size stock into your machine. e.g. maybe you want to machine out a 24"x24" piece of mdf.
¶ Going Large
Ballscrew whip becomes a factor at larger build sizes. A common remedy is upgrading to larger diameter ballscrews (2010 vs 1610). . You can preload the ball screws a little more - that helps up to a certain point - but then only mechanical supports or the change to stationary ball screws with rotating nuts will help.But I think [at 1250x1250] just changing to 20x ball screws will be fine. There has been success with 1610 ballscrews at 1300x1400 (link to build).
¶ Going Small
The PNC can be scaled down without any difficulties. However, it is important to remember that machine price stays relatively static over a wide range of sizes. Therefore, you should not downsize unless you have reason to. Smaller build areas will limit the type of projects your machine is capable of.
¶ Smallest Recommended Size:
The PNC becomes more space-efficient at larger sizes. This is because about 300mm (12") of space is sacrificed to mount the stepper motors and bearing blocks. Consequentially, below 600mm (24") in the Y direction, you will only have <300mm (<12") <50% usable build length. You are better off making a moving bed system that has a constant ~50% usable area. This isn't to say it isn't possible, however.
¶ Frequently Asked Questions - PrintNC Planning
¶ Q - How do you change the steel beam size, frame size and other parameters in the model?
Correct way of modifying the Fusion360 file
¶ Q - Are there any major changes from v2.1 to 3.0 that would cause me to want to get any different parts in the full ali kit? My understanding is 3.0 is officially including the narrow Z.
Logan: No major changes, and the ali parts are the same, the only changes are the Z plate, tram plate and some printed part and shorter X rollers.
¶ Q – Any guidance on what I should do for build size? Is there a rule of thumb?
Logan: A good rule of thumb go 2" bigger for the work area than you think you'll need. It's negligible in cost but much better than being 1/2" too small. Also NOTE: the X Steel roller should be 90mm for 100mm bolts to work, convert that to imperil if you want to. Sounds like both calculators need a tweak. (New 2.1 narrow Z axis is the trigger for 90mm X roller and 100mm bolts)
¶ Q - What is the history behind why the X axis is wider than the Y in the default size/configuration?
hoges: The reason the default build has a longer X than way is it makes your work area more accessible. Work holding is one of the most important things in CNC so being able to easily secure everything down is vital. A longer Y makes life just a little bit more annoying if you're dealing with it everyday. When the builds get bigger then it makes sense to go for a longer Y, you probably have a larger workshop where you can access the sides easily. For the desktop size convenience and practicality win out
¶ Q – I want to go over 1500m in an axis, is that a problem?
hoges: 2010 is the current best advice for lengths >1500mm
¶ Q - How do you know the exact ballscrews you want and do I need to specify them when I request my quote?
Flukester: Your screenshot from a few hours ago had 1605/1610/2005/2010 listed in purple. I think you’ll need to specify exactly what you want. Maybe you did and I missed it..?
JeffM: Omg, Thanks a ton
Flukester: No problem, check the bkbf12 vs bkbf15 and the couplers, all related to ballscrew if I’m not mistaken.
Logan: I mean, the comments on the right describe which bearings go with which ballscrew sizes pretty clearly…
JeffM: I had no idea that the spec saying "1605/1610" was derived from the sizes. Maybe it would be good to label that with, "Recommended size:". Is there anything via Wiki to explain the different sizes so we can learn about what we are buying.
Logan: 1605 is for nema17 steppers. It's basically an obsolete option, we just encourage everyone to start with nema23s. less headaches down the road.
16 is the ballscrew diameter. 5/10 is the pitch, the distance the ballscrew nut moves per rotation.
JeffM: I'm definitely purchasing the 23's. And when does one go to the 2010?
Logan: For bearing blocks, BK12 is for 1610 ballscrews. That's the default size, it's listed as such in the stock build itemized list on the ali store.
BFBK12 just means 1 bf12 and 1 bk12, for each end of the ballscrew (therefore you need 3 for a standard 1x + 2Y machine, the Z axis uses a smaller ballscrew and BKBF)
¶ Q - Do you have a recommended height for an enclosure? How high is the top of the Z to the wasteboard or table surface?
Logan: mine is 28" tall inside
paul80: Hi everyone. I've decided to go with a 5' wide working area which gives me a X gantry of 75" (1905mm). Is this still in the 4x2 .120" threshold?
Logan: The height depends a bit on your Z plate height and stepper length
paul80: Thanks. Is that about 5" clearance above your stepper?
Logan: But a quick add says 2" frame + 4" z clearance + 12" z plate +2" motor mount + 4" stepper is 24", give or take a bit. Also - doors and removable panels are key.
¶ Q – Is GRBL good enough? Do I need to go LinuxCNC?
This is largely down to preference and desired features. @NeoKurtex indicated that a GRBL based system can keep up with the capabilities of the machine for most hobby uses.
¶ Q – Has anyone built a PrintNC with the motors mounted on the rear instead of the front, which would allow the spindle to pass the front of the Y rails and overhand the table? This would enable end-grain joinery at the end of the table.
Yes, Hudbrog did. You can see it in the build database here: https://www.notion.so/Hudbrog-8b1cb4a1896143dc9794ecaa0e915d3b
Another way to enable end grain joinery is to cut open an area in the wasteboard and design a way to hold your work vertically. If this is a desired use of your machine it is good to consider how you would align and workhold material like this when designing your table.
Bear in mind if you move the motors to the rear, the spindle/endmill can reach past the “front” of the machine, which could have safety implications you need to plan for.
¶ Q – What are the size steps in linear rails?
Standard sizes usually come in increments of 50mm but most Chinese vendors will cut them to a custom length if needed.
¶ Q – What kind of steel should I be pricing?
Hot rolled, 11 gauge (.12”) rectangular steel in 3” x 2” for imperial. Unless you have a wide X gantry in which case there is discussion about increasing that piece to 4” x 2” if your X gantry will be >= 4’ or 1220mm.
@JJ119: 0.120" will be stated as so, 0.125" will be specified by 11 gauge.
Trader: In the US is .12" commonly available alongside .125"?
JJ119: a500 is a LOT more common, a513 is better as its more dimensionally stable. And yes 0.12" is very common. However, confirm what you are getting with your supplier
gerrg: I got a bit of both when I did my order with Metals Supermarket. Specify that it should all be the same type, A513 (if possible)
¶ Q - How is the X gantry length determined?
X gantry length is determined by X frame width + 1" (25mm).
The “Y rollers" that the X gantry beam sits on top of are 3" wide (using the default imperial steel size of 3" x 2") and are centered on the 2" Y beams below. Therefore they have a .5" overhang beyond the Y beams on both sides. The overhangs inside the frame are already accounted for in the X frame width. The additional 1" accounts for the .5" overhang on the outside of the two Y beams.
As noted elsewhere, some people have opted to increase their X gantry length by 4" on one side to attach the cable chain, which is not currently considered in the design or calculator. Alternatively, angle brackets can be added fairly easily instead. There are some photos under the Assembly section showing how other PrintNC owners have handled this.
¶ Q- So BOM shows qty 4 grease fittings and not included in Ali kit?
Logan: Yep. Grease fittings are included with the carriages but grease fittings are not included with the ballscrew nuts. There are 4 ballscrew nuts that need grease fittings. The m6 45 degree ones are just an adapter with a straight m6 screwed into it, so you can make them into straight ones as well if needed.
the rail carriages have m6 45 degree grease fittings included included, whereas the ballscrew nuts do not come with grease fittings. You need 10 total, 6 are included, thus 4 extra.
thesnuggs: Gotcha. And is it a needle type connector?
Logan: no. it's a zerk fitting
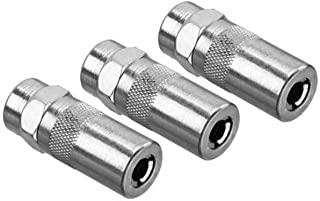
This type of end comes with every grease gun, it's the stock standard. It's why the tip wasn't specified, it didn't need to be.
¶ Q - I'm getting close to ordering steel. I want to go with @Logan BC 🇨🇦 's narrow mod. Does that change the X Roller dimensions? Where do I find the parts list? Running Fusion 360 is not easy for me.
Logan: 90mm steel 100mm alu angle
wrickert: Just to make sure I understand, I need:
1ea 3.5" length of 2"x3" steel tube section
1ea 4" length of aluminum angle
I feel that I am missing something from the aluminum angleLogan: Just 2x3x1/4" 6063 aluminum angle
wrickert: Thank you. I appreciate it
Logan: Get some 4x1/2" aluminum flat bar at the same time. 18" is enough for both the Z plate and tram plate but get extra. ;)
wrickert: Oh, good call. I saw a note in the wiki that the flat bar can be 6061.
Logan: Yep. The reason for 6063 for the angle is it's a 0 radius inside so you don't have to file it.
¶ Q - Will 2x2 aluminum work for the Z-axis narrow mod or should I look for another provider for that?
Needs to be 3" deep for the bearing block to fit. 3x3" will work though.
¶ Q - If I just want to buy a set of Z axis aluminum plates and the upgraded Y roller caps from the start where can I get them?
If you don't want to make the temporary wooden Z plate and mill your own later, there are multiple options to source the parts:
- Ask on Discord on the #marketplace channel, there may be a member near you who can mill them for you on their PrintNC on good terms and you make a new PrintNC contact.
- If not, folks like @Logan can (and have) made and shipped plates to members on good terms.
- You can outsource the parts to a professional shop: @natewalck used a company he found on AliExpress called Best Creating or if you prefer to use a US Vendor @Trader has had good experiences with Xometry for both aluminum milling and 3D prints & instant quoting. This sign-up link will get you a $50 referral credit with Xometry to try them out.
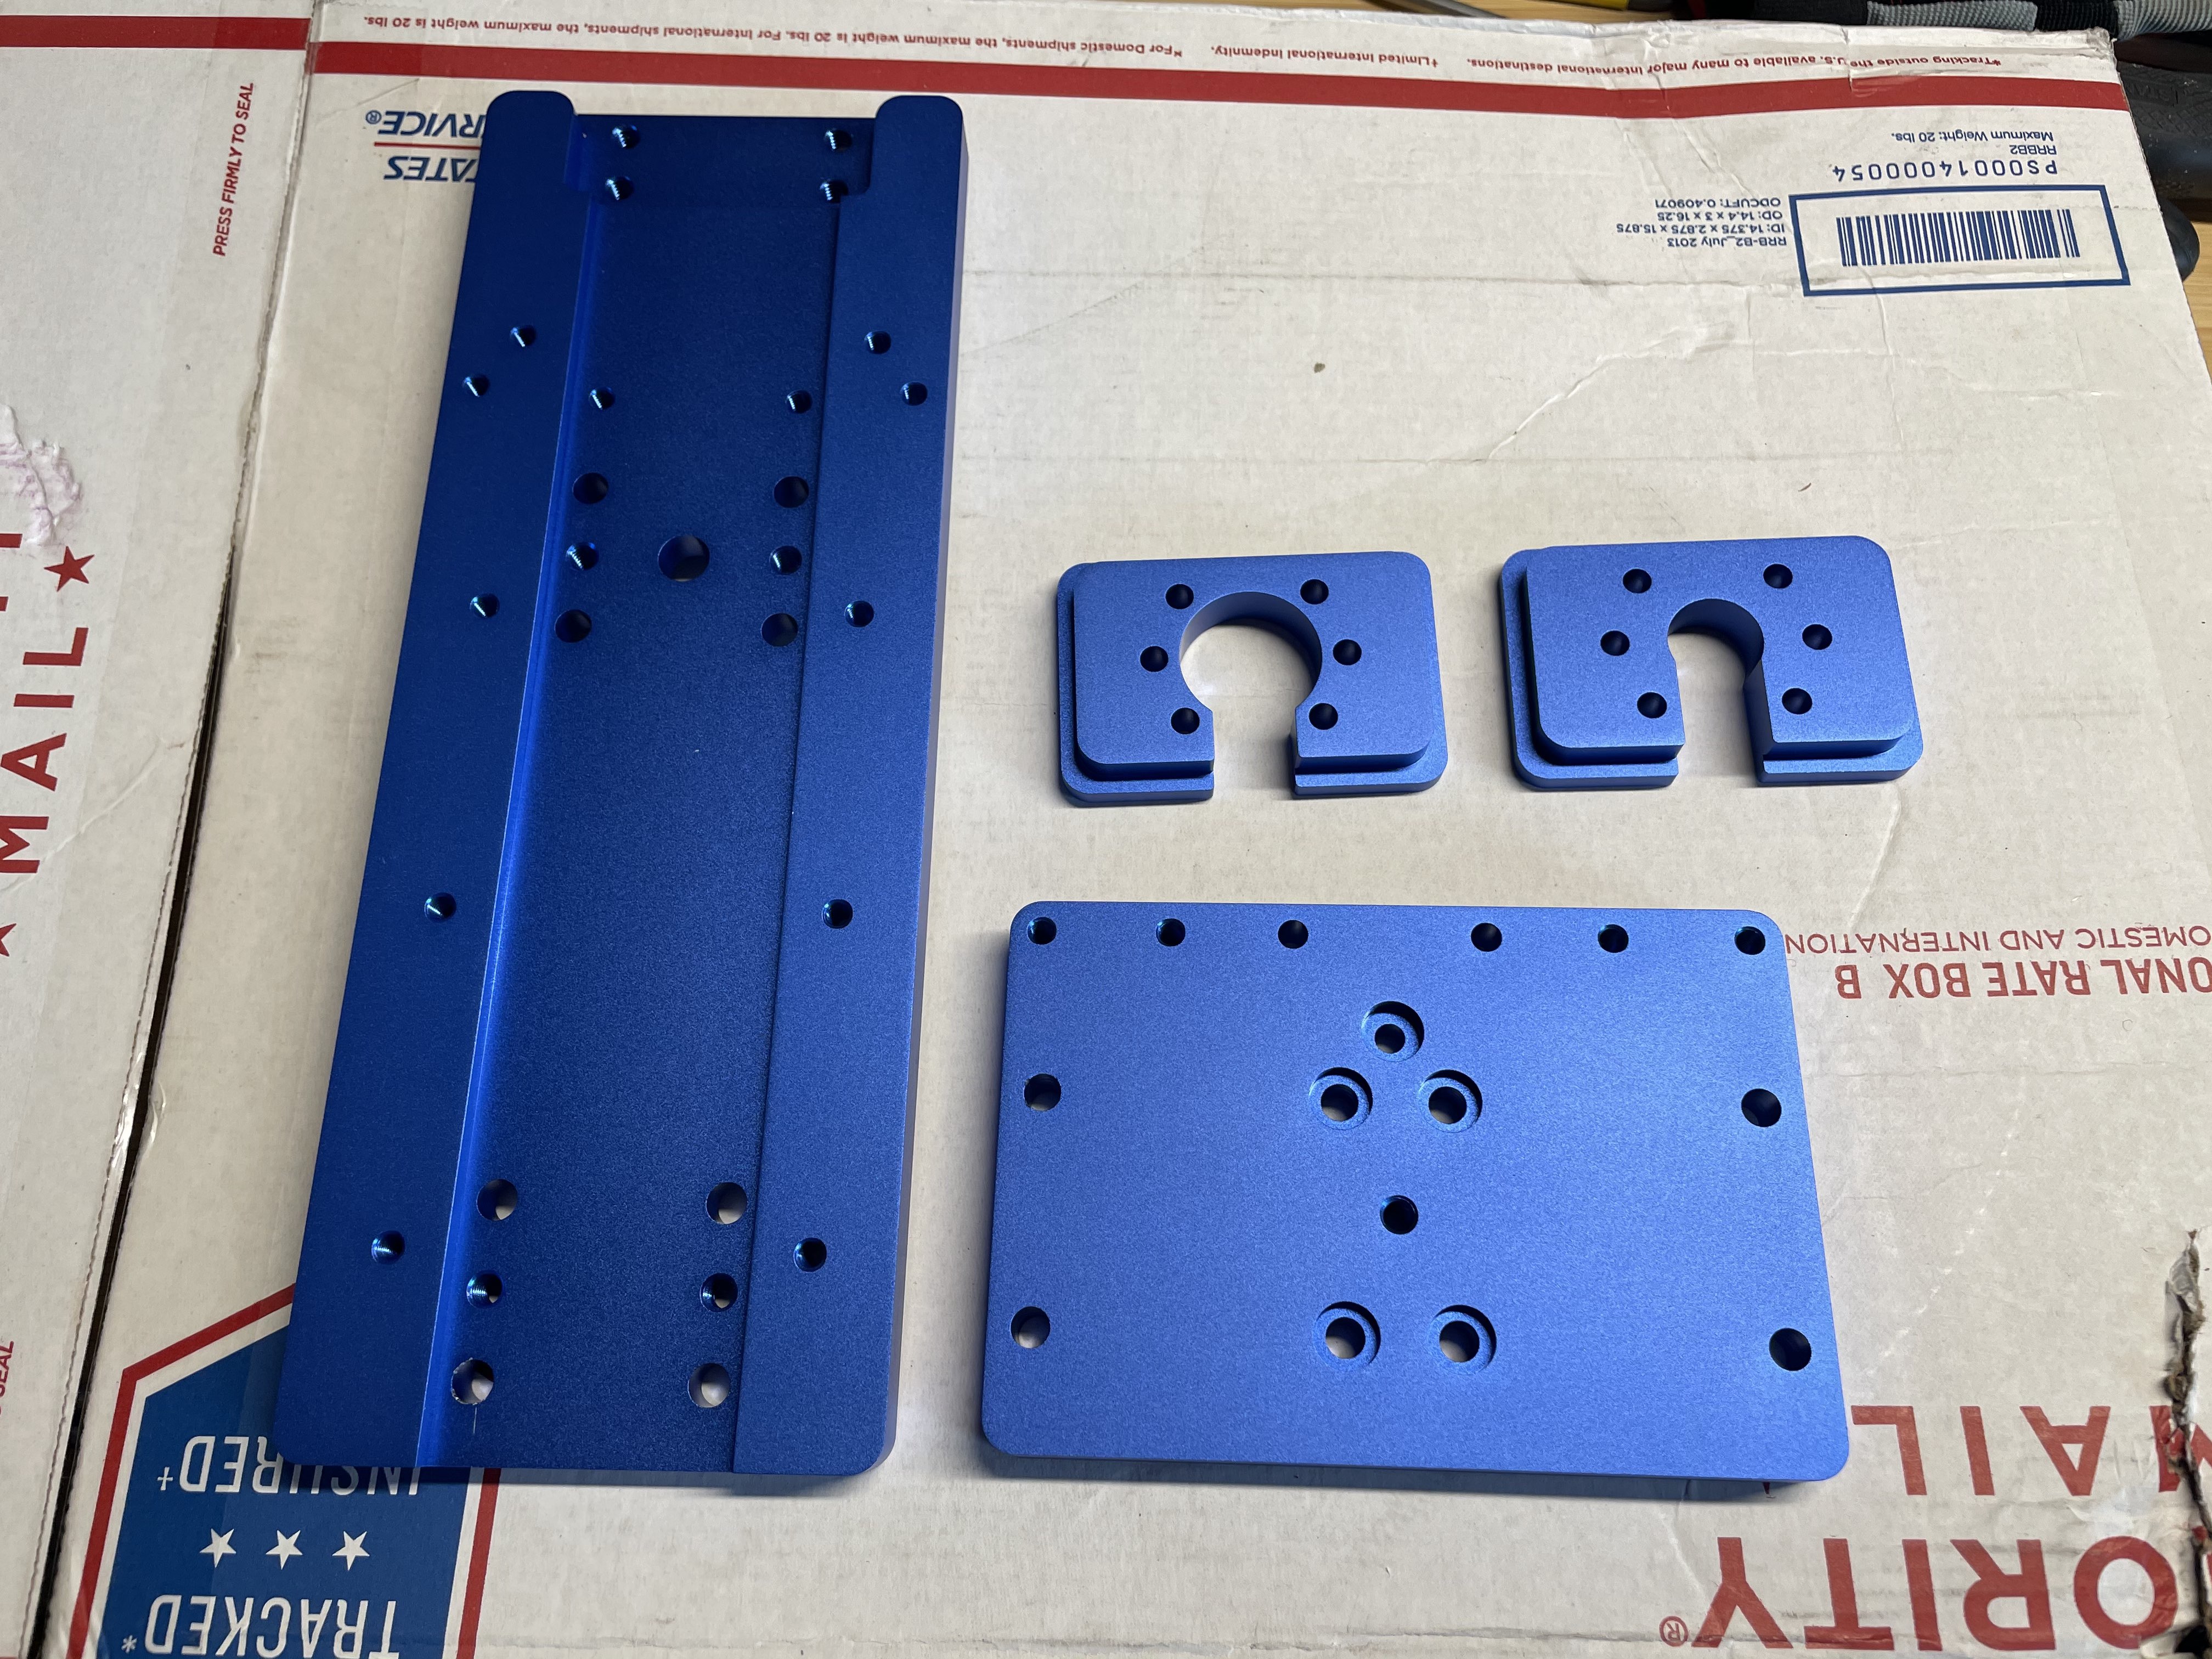
Above are the custom plates that community member @natewalck had made from 6061 aluminum and anodized. natewalck: like 1-2 weeks of back and forth while I gave them the wrong files followed by the right files. $219 including shipping. The shipping was $53. 3 Days to ship once the order was sorted out.
¶ Q - If you have all the parts and no major mistakes get made, about how many hours to go slow and carefully and complete a build?
@Logan That's a loaded question. How skilled are you with electronics and wiring? Are you power tapping or hand tapping? Are you cutting the steel yourself? Are you prepping and painting it?
I would say anywhere from 2 solid weekends to ... 6 months. :smile:
--
@M0jo QC CA:
a weekend to paint
1 or 2 to drill/tap
electronic was super slow due to the amount of connectors to solder and a box way too deep, maybe 2-3 weekends
1 to fiddle with the ballscrews/rails alignment
1 to mess with linuxcnc
And I probably forgot some stuff...
and that was with about 4 hours per day
Sounds like 40-60h overall.
¶ Q - I am trying to decide which way to go for my CNC controller. I first thought I would go the Mach3/Mach4 route but am now seriously considering the GRBL option with a stand alone controller. The OpenBuilds BlackBox motion controller caught my eye but it seems that it is limited to 24V for the stepper drives. Is 24V enough? Does anyone know if the BlackBox can support 36V, the documentation is a bit spare on these details? From reading through posts here I get the feeling that 36V would be better. Is that correct? I really like the 6Pack Universal controller now that I see it so I am leaning that way. Lastly, the Estlcam software looks like it is very versatile and the price is really nice compared to something like Mach4. I anxiously await your inputs, I am new to CNC but have decades of EE design experience so I get deep into specifications and such.
Trader: I went down almost the same exact decision path. Here is what I determined for my use case:
1) Blackbox is nice but it does appear to be 24V only and has integrated drivers. It will work but you will miss out on some of the grunt of the motors, which is a loss given the rigidity of the PrintNC. On the upside – a commercial turn-key option removes a lot of questions and sourcing and wiring initially.
2) I really like the 6Pack controller, but as others tried to tell me from the start, once you price out all the desired modules, it is the same more or more than the $119 Mesa 7i96 card (I think my config for the 6Pack was around $140). Given that, and how small the audience is, and being tied to a fork of GRBL I decided against it. I still think it is a very well thought out product.
3) If you're not already really comfortable in a given eco-system, there is value in being on the most popular platform used by the community (at the moment, LinuxCNC). I resisted this because I am somewhat comfortable with GRBL (I have an existing machine using it) and I dreaded fighting with Lnux on an old PC with parallel port and BIOS performance tuning and an unknown time commitment. The $119 Mesa card (7i96) for LinuxCNC nicely sidesteps this and lets you use any modern PC and not depend on legacy hardware. For me, I am prepared to trade the $119 for the time and convenience of that.
4) The 36V vs 24V thing also relates to motor power. You could still have a really good machine at 24V with a Blackbox controller, but you wouldn't be able to unlock all of the potential of your machine. However, it might be a smoother experience if you're more comfortable with a commercial solution for the control side. You can always upgrade the power and control later, that is the nice thing. Don't let any of these things stopped you from getting started.
In the end I decide to go with DM556 stepper drivers and wire with 18AWG wire so if I want to upgrade motors later I don't need to change those parts. I went with the stock kit motors and while I ordered the 350W kit PSU, I have been convinced to buy the used Cisco PSU that is popular and lets you run at 42V as well as providing 12V and 5V rails for other components in your control box. @"Bob" from PA went that route and has one or two extras and has kindly offered to sell me one. For control I decided to go with the smaller $119 Mesa (Model 7i96) card and have a few old laptop or desktop options I can free up and will run Debian and LinuxCNC on a dedicated machine.
¶ Q - Is there a noticeable improvement in speeds to warrant upgrading to DM556 vs the DM542 in the Pro Kit? I'll be using a Cisco PS.
Logan: It's not really about speed, it's about current. If you're using 3 or 4A motors, no difference. But a 556 is capable of 5.6A output so if you're using 5A+ steppers you need dm556s.
¶ Q - What is the spindle weight on it's own?
Hoges: ~5kg, maybe more
Mudd Flapp: My 2.2KW is 5.14kg, without water or mount.
¶ Q – What do I need for initial tooling (aka cutters, bits, endmills)?
If you’re new to CNC work you don’t need a lot and you will probably make some mistakes and snap endmills during zeroing or due to mistakes in rapids or toolpath generation. So don’t over spend on tooling, practice with more affordable Chinese bits until you get the hang of things.
A two flute up or down cut bit. For many applications, especially in wood and aluminum, the “go to” bit is a ¼” diameter, two flute, up cut or down cut bit.
Additional bits you may use regularly are a surfacing bit to level your waste board, a V-carve bit for lettering as well as chamfering edges, and an aluminum rate up cut bits for experimenting in aluminum. A 1/8” up cut bit (or @hoges recommends moving up to 4mm for more strength and similar small size to the 3.175mm 1/8” bit) for detail cuts in small areas.
Surfacing bits come in large diameters like 1”, 1.5” and 2” and are run very shallow across your MDF wasteboard to level it to the cutter.
45 degree (sometimes written as 90 degree, as each side has a 45 degree angle) V-carve bits are useful for sign making (lettering) and chamfering edges.
Aluminum is less forgiving than wood and crashing a bit into the workpiece, even briefly at low speed can snap the bit, so buy more than one. You will snap aluminum bits more than wood bits when learning.
There are a lot of other bit options and specialty bits to explore later, and always research recommended bits, feeds and speeds as well as relevant work holding techniques when trying out new materials on your CNC machine.
--
hoges: 6mm single flute is a hugely versatile tool, they can be run a very high feed rates in most materials with great material removal rates (MRR) yet are small enough that you can get into reasonably detailed areas
They also don't waste too much material with the slot they create
You will see 1/8" or 3.175mm recommended everywhere, I personally dislike them as they are very fragile
4mm is only slightly larger but a much stronger tool that is more forgiving and can be run at good speeds
See the acrylic video I posted today using a 4mm 2 flute
¶ Q – What about the straight bits I have in my existing collection?
Yes, those can be used as well. @hoges indicated he liked a 6mm straight bit for a lot of this work in wood.
¶ Q – Where can I learn more about up cut, down cut, straight cut and compression cut bits and how they perform on a CNC machine?
Jonathan Katz-Moses rented a very high speed camera and did up close shots of the different bit types cutting on this CNC. You can hear what he has to say about basic CNC cutting bits here: https://www.youtube.com/watch?v=seAmL6mtqgM
¶ Q – What are up cut, down cut and compression cut bits?
Up cut (aka up spiral) bits tend to tear the top surface but give a clean cut through on the bottom surface. Up cut bits have good chip evacuation.
Down cut bits give a clean cut on the top surface but can tear the bottom surface on exiting the material. Down cut bits get hotter as they push the bits downward and don’t have as good chip evacuation as up cut bits.
Compression cut bits have an interesting and complex geometry where the first few mm of the tip are down cut and then it switches to up cut for the remainder of the cutting length. This causes the material to get pulled up and pushed down simultaneously (thus the term compression bit or compression cutter).
This approach allows compression bits to enter the material without damaging the top veneer but also allows them to exit the bottom surface without damaging it either. Chip evacuation is poor with compression bits but they do something interesting in that they pack the kerf with the chips. Since the bottom few mm are being pulled up and the remainder is pushing down, other than vacuum removal, the kerf will be tightly packed with chips. This can help stabilize pieces with fragile edges and small tabs.
Compression bits work best at full cut depth of the bit or even 2x cut depth, so they require high speeds to run and good confidence in your tool path. Name brand compression bits are also considerably more expensive than up cut or down cut bits.
¶ Q – Where can I get some affordable endmills / router bits to get started with while I am learning?
@hoges said: Don't buy expensive end mills into you have a bit of experience under your belt. You will break a lot more than you expect while you're learning, nothing is worse than snapping a $50 end mill moment after it's out of the packet
These are about as cheap as end mills get but are still quite good for the price https://s.click.aliexpress.com/e/_AKJqHv
These are super cheap and ok, not anything special but decent enough https://s.click.aliexpress.com/e/_AntAEb
You can get a couple of all the little ones so have a fully stocked selection and one of the big ones each too
You're going to want a 6mm 45degree chamfer mill
https://www.aliexpress.com/item/32958958308.html
Grab some ball end end mills too so you can do carvings
With what you have got from that list you're going to be ready for nearly anything