¶ Web Builder Available
Terje Io (the creator of grblHAL) has released a web builder which can be used to compile firmware for supported boards. Fortunately the Flexi-HAL, GRBLHAL2000 and PicoBOB are available, so this is a great option if for some reason you can't use the official Expatria releases for your PrintNC.
If for some reason the web builder doesn't work for your uses, the following has some basic information on compiling your own build of grblHAL.
¶ A Beginners Guide to Compiling GRBLHAL
There is plenty of information out there on how to get started and program the GRBLHAL, but all the guides assume some sort of knowledge. I hit a number of roadblocks when I tried to go down this path, and almost gave up a number of times. BUT I persevered and eventually got there.
I am using the HAL2000 board with a Teensy 4.1.
Note: Early-2022 developments in grblHAL plugin architecture with support for multiple VFDs are making it less necessary to compile your own version of grblHAL. If you have a “standard” 3-axis PrintNC without special plugin needs, check the Expatria Technologies Github for a precompiled release to suit.
¶ Set Up Visual Studio Code
Set up Microsoft Visual Studio Code on your computer. Please note that I am a Windows user so this guide is Windows specific.
https://maker.pro/arduino/tutorial/how-to-set-up-visual-studio-code-for-arduino
¶ Set Up PlatformIO
Set up PlatformIO inside VS Code (Visual Studio Code)
https://maker.pro/arduino/tutorial/how-to-use-platformio-in-visual-studio-code-to-program-arduino
This is a very comprehensive guide on how to install PlatformIO. Make sure you follow it EXACTLY as outlined in the how to. You can stop once you get to the section on Installing Libraries.
¶ Install Github Desktop
Install Github Desktop on your computer. That can be found here https://desktop.github.com/
¶ Clone the GRBLHAL2000 Repo
Now we can start trying to get our head around Github. Expatria Technologies is behind the fantastic GRBLHAL2000 breakout board. He has done the hard work for us in more ways than one. If you head over to his Github, there is a Repository with the code to suit the GRBLHAL2000 board with the Teensy 4.1 development board.
Navigate over to https://github.com/Expatria-Technologies/iMXRT1062 and make sure you copy the URL.
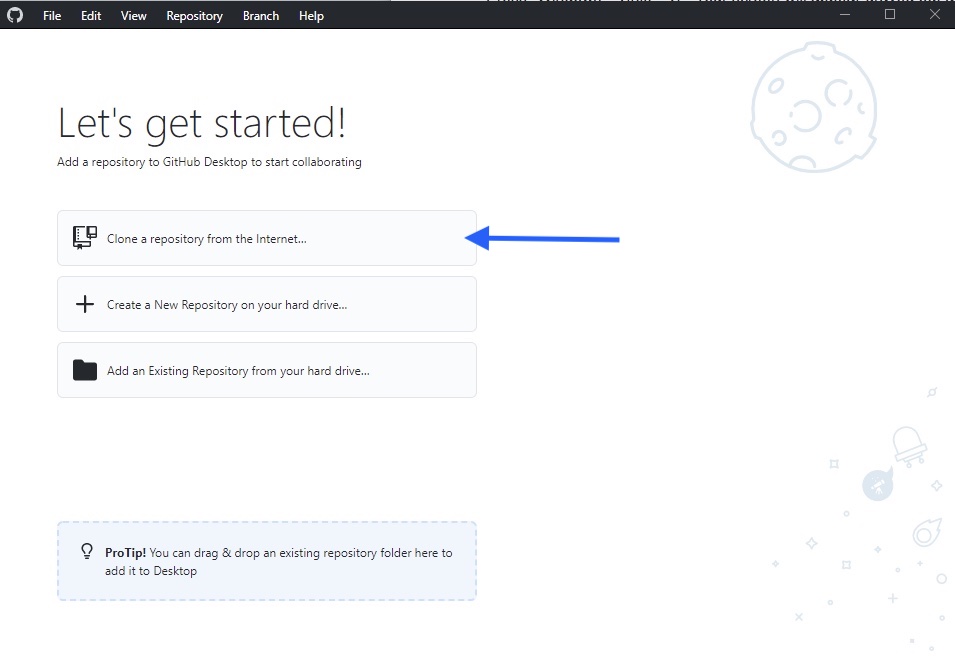
Next, click on URL and paste the link to the repository you want to clone. Then click Clone. This will grab all the files needed to build our new firmware.
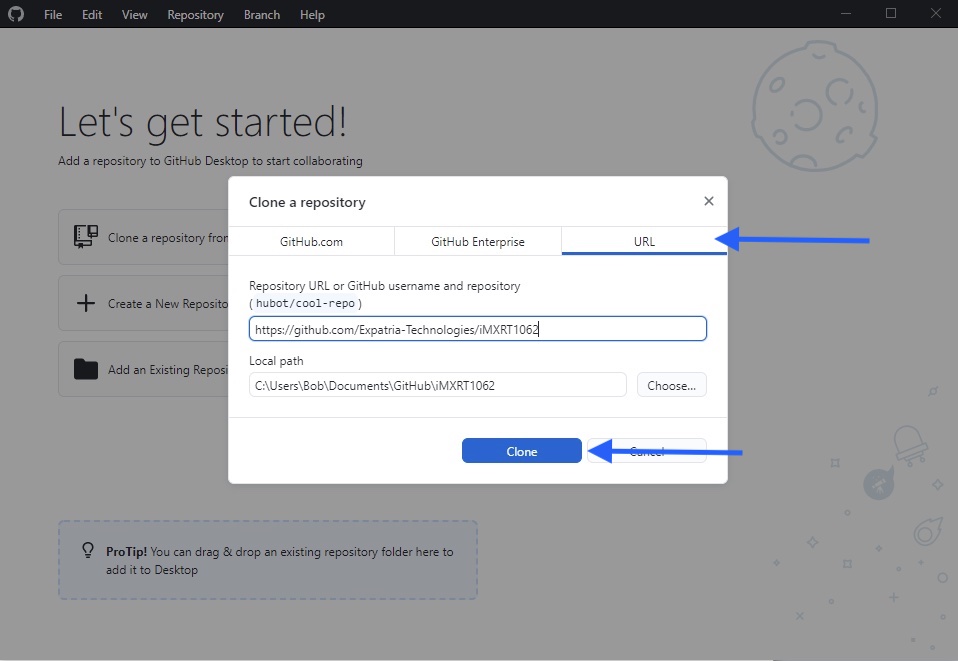
Take note of the “Local Path” destination directory. You will need this for the next step.
¶ Load Project in VS Code
Now we need to launch Microsoft Visual Studio Code.
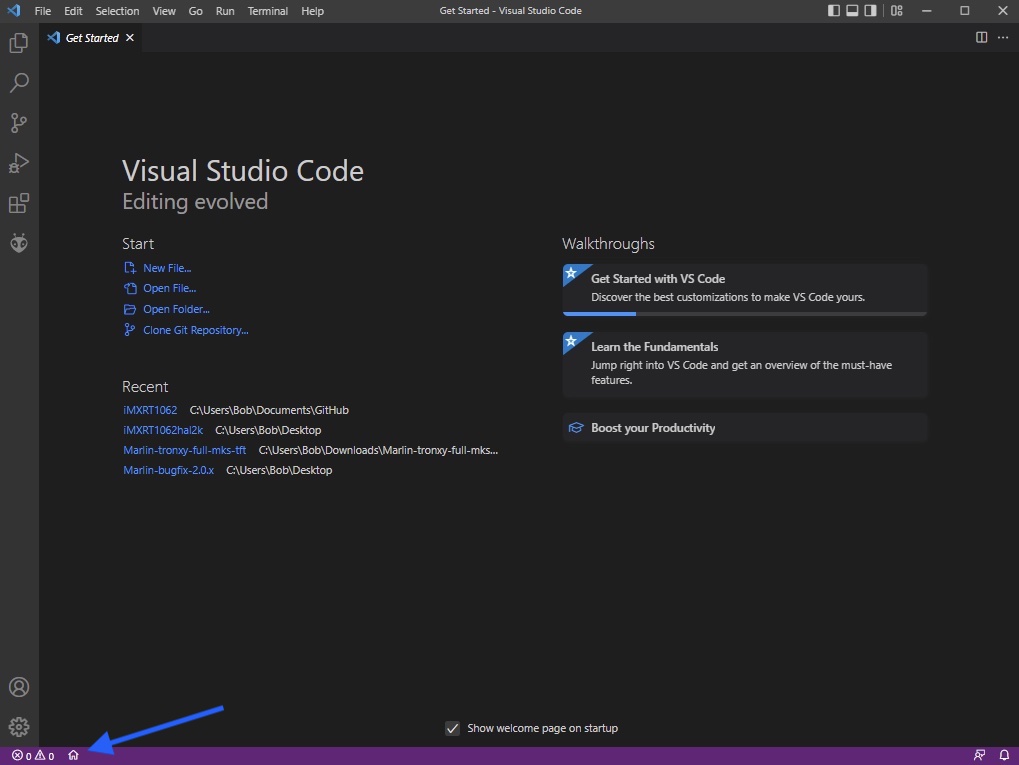
Open PlatformIO by clicking on the house symbol in the bottom left hand corner
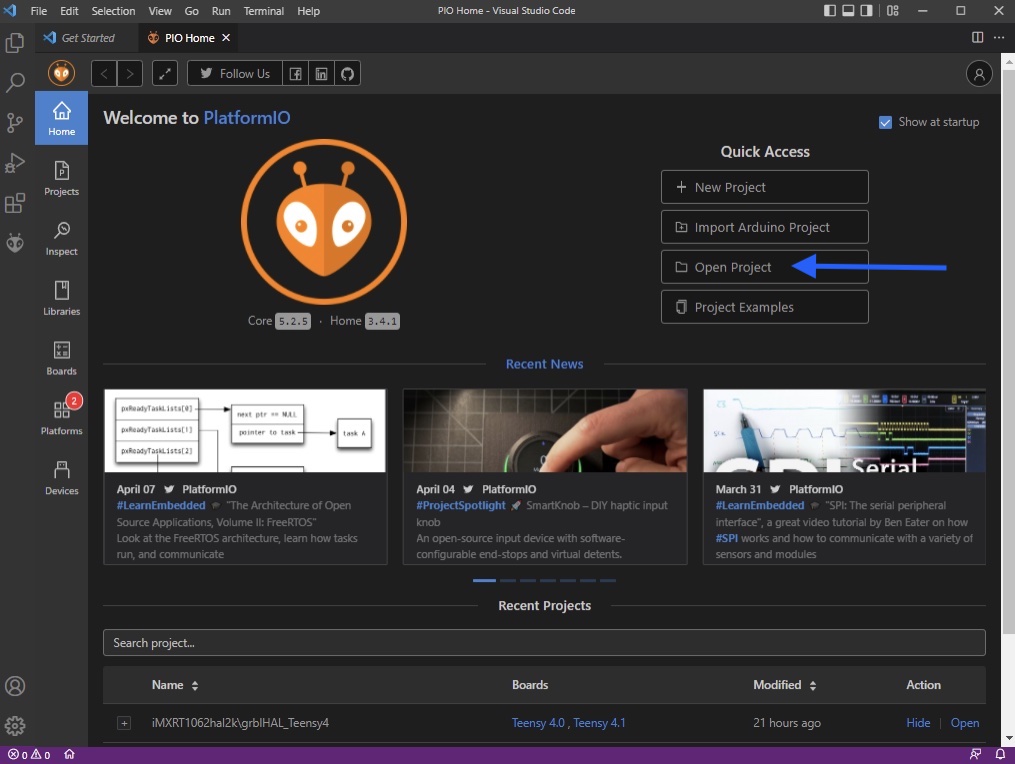
Next, click on Open Project
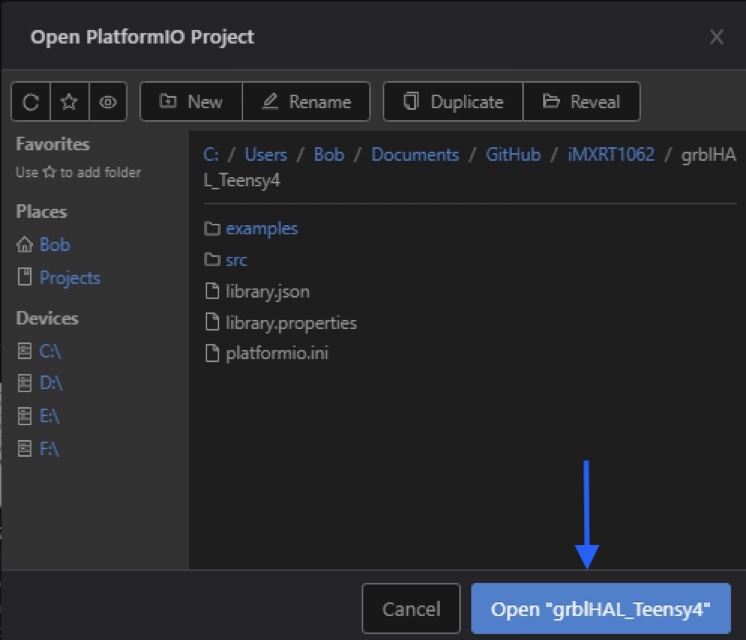
Navigate to the directory where you cloned the repository in Step 4. Open the folder, and then look for a folder called iMXRT1062. Open that folder and then open a folder called grblHAL_Teensy4.
Next click on Open “grblHAL_Teensy4”.
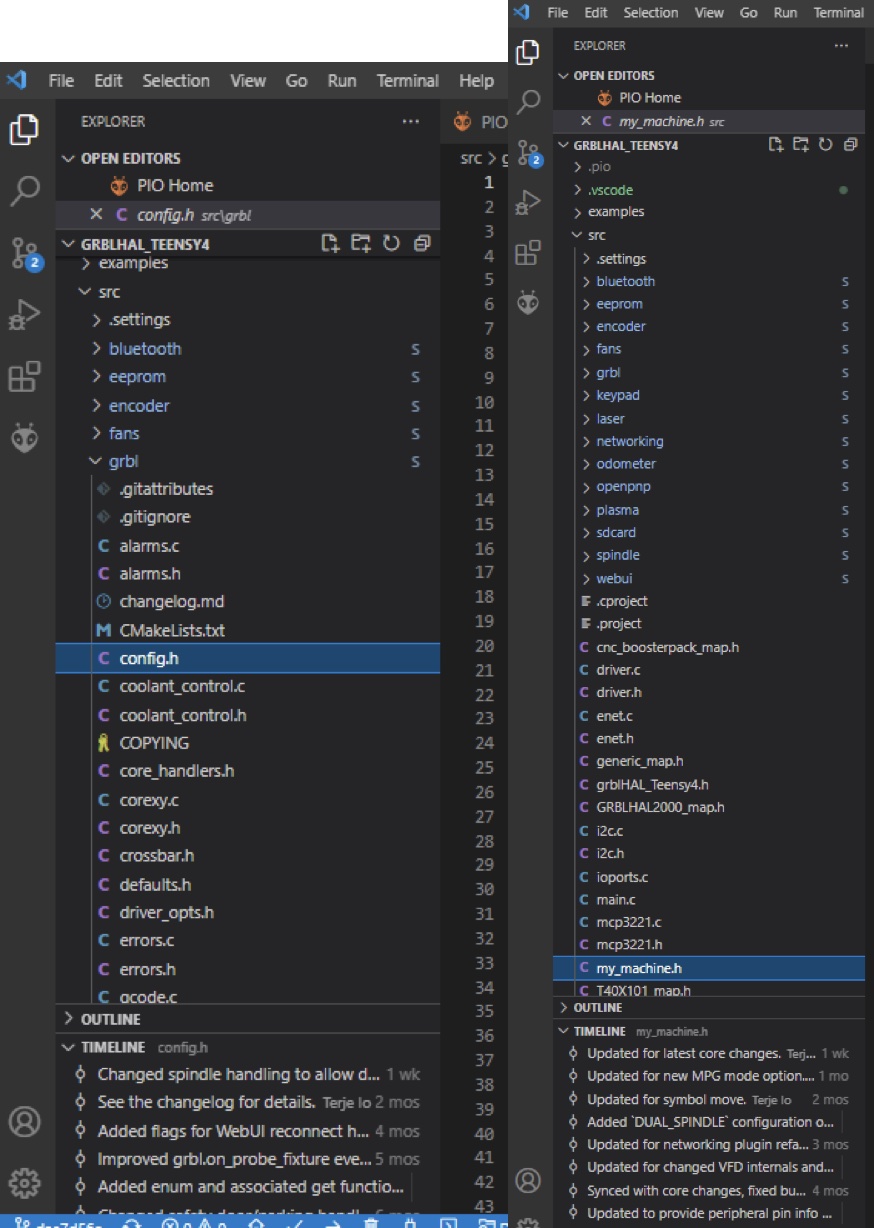
There are only two files that you might need to modify. The first being config.h and the second one being my_machine.h
I won’t cover modifying those as that is a whole new “how to” on its own.
¶ Compiling with PlatformIO
Compiling your source code.
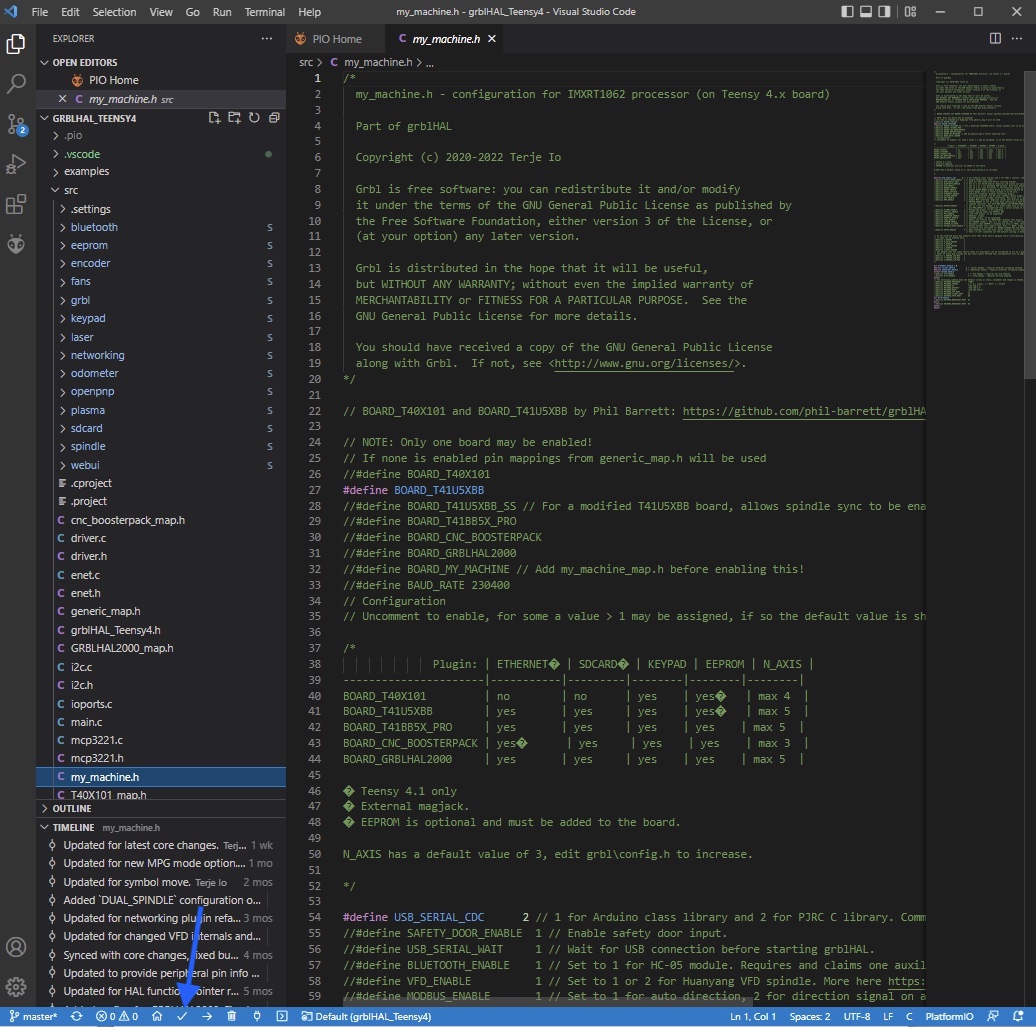
Click the tick symbol in the bottom left hand corner. This is to build your firmware. Once you do this, you will have some compiled firmware!
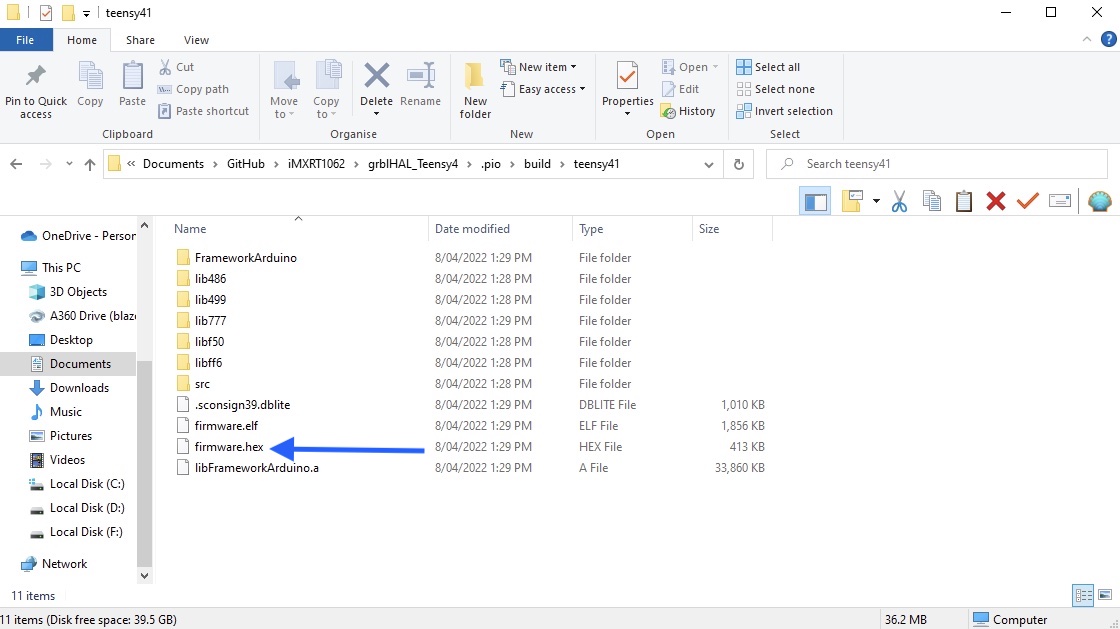
Firmware.hex is our new firmware to load on to our Teensy 4.1.
¶ Flash firmware to Teensy 4.1
Now that you've compiled your custom firmware, you can follow the Flashing Firmware guide to flash it to your GRBLHAL2000 board.
¶ Compiling GRBLHAL from the command line
For those who prefer the command line.
¶ GRBLHAL2000 with Jog2K support, probe protect (latest core)
(Tested with PlatformIO Core version 6.1.14 and git version 2.45.1 on Fedora 40.)
1. Install PlatformIO Core and git. (PlatformIO IDE is not needed.)
2. Check out source code:
git clone --recurse-submodules https://github.com/grblHAL/iMXRT1062
cd iMXRT10623. (Optional but recommended) Before making any changes, sanity check that compilation works:
(cd grblHAL_Teensy4 && pio run)4a. (Optional) For Jog2K support:
git rm grblHAL_Teensy4/src/keypad
git commit -m "Remove keypad submodule"
rm -rf .git/modules/grblHAL_Teensy4/src/keypad
git submodule add -b Interactive_Jog https://github.com/Expatria-Technologies/Plugin_I2C_keypad grblHAL_Teensy4/src/keypad
git commit -m "Add keypad submodule with Jog2K support"4b. (Optional) For the probe protect plugin, use changes from jevermeister at https://github.com/jevermeister/grblhal2k_probe_plugin/commit/4939d2a91ac4b9f58a56c2ffd05ab3502a534eba:
git submodule add https://github.com/jevermeister/grblhal2k_probe_plugin grblHAL_Teensy4/src/probe_protect
git -C grblHAL_Teensy4/src/probe_protect switch -c from_jevermeister 4939d2a91ac4b9f58a56c2ffd05ab3502a534ebaThen follow the directions in grblHAL_Teensy4/src/probe_protect/README.md. (Note: not working with 20241113 core.)
5. Apply customizations. Relevant files include:
grblHAL_Teensy4/src/my_machine.hSee configuration from Expatria for guidance.grblHAL_Teensy4/src/grbl/config.hgrblHAL_Teensy4/src/boards/GRBLHAL2000_map.hgrblHAL_Teensy4/platformio.ini
Relevant code fixes MAY include (please don't apply blindly):
- A fix for missing $392 (DoorSpindleOnDelay) or $394 (SpindleOnDelay): https://github.com/Expatria-Technologies/core/commit/05850066d22da9a4f896f58b132cb19d5506142a. See discussion in https://github.com/grblHAL/core/issues/538.
6. Compile. The build output will show where the firmware files are:
cd grblHAL_Teensy4
pio run