¶ This page is being archived as a new wiring and enclosure combined page has been added here: Wiring and Electronics Enclosure
¶ What to use as enclosure
Typically electronic enclosures are metal boxes with a large opening at the front. Buying a dedicated enclosure comes at its cost, but can bring some features which metal cabinets for other purposes often don't offer. Things you should look out for an enclosure:
- size: The recommended size is 24x24x8" or 600x600x200mm. This assumes that the VFD and a normal 36V PSU are mounted inside. If you want to place a Cisco server PSU or a PC inside, you will need more space. If you mount the VFD outside you may need less.
- removable mounting plate: you can mount everything on the mounting plate outside of the enclosure and then move the mounting plate inside. This makes mounting everything easier.
- Ventilation and filter: The parts inside the enclosure produce heat which must be moved outside, so you need at least one fan. Both the air inlet and outlet should be covered with a filter to avoid dust and metal chips polluting or even shorting the electronics.
If you are on a budget:
- check for second hand enclosures
- use an old mini server case
- split the electronics to 2 smaller enclosures, e.g. tower PC cases
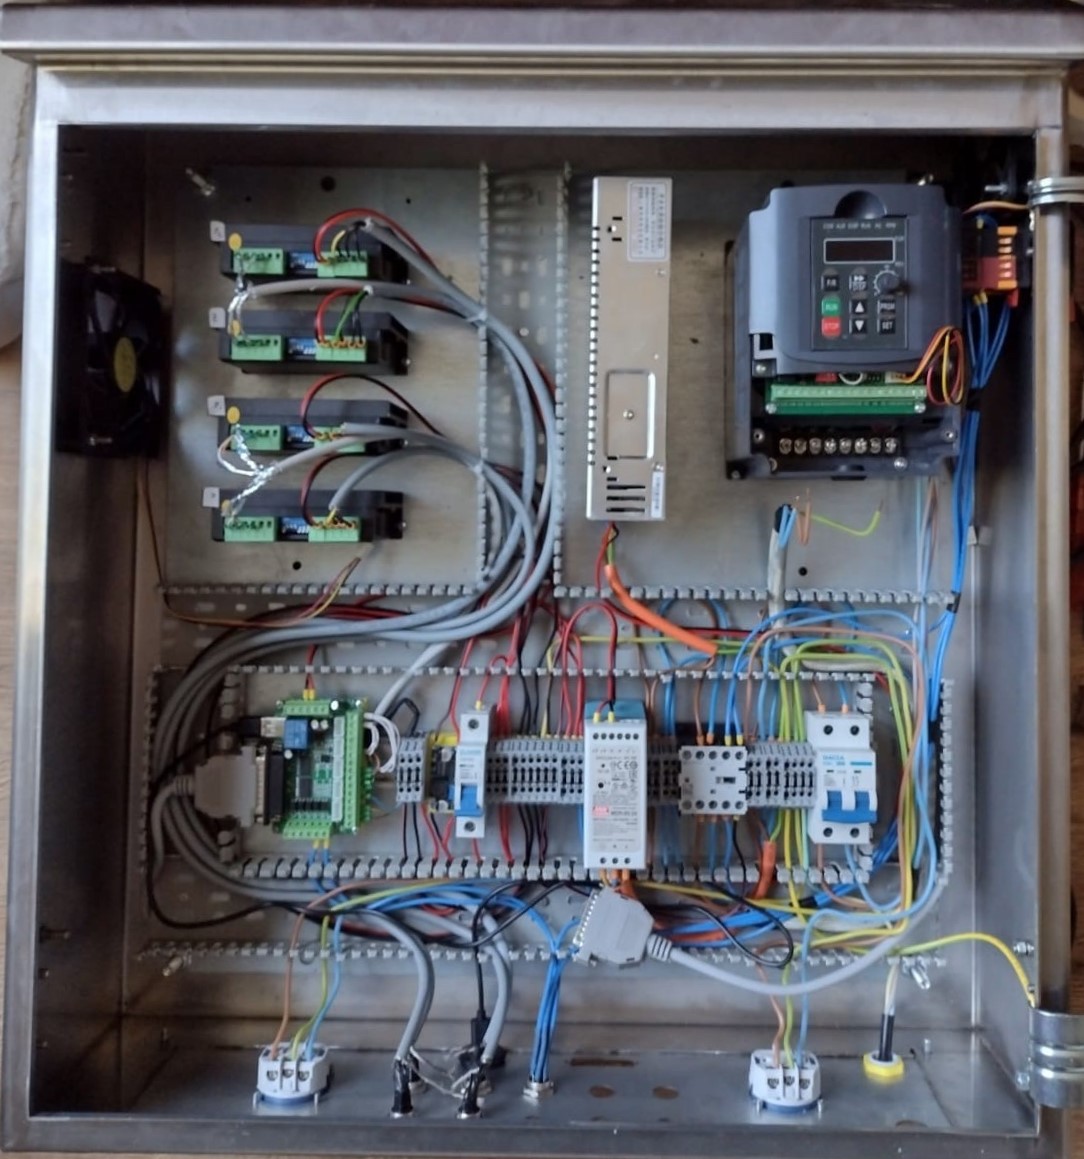
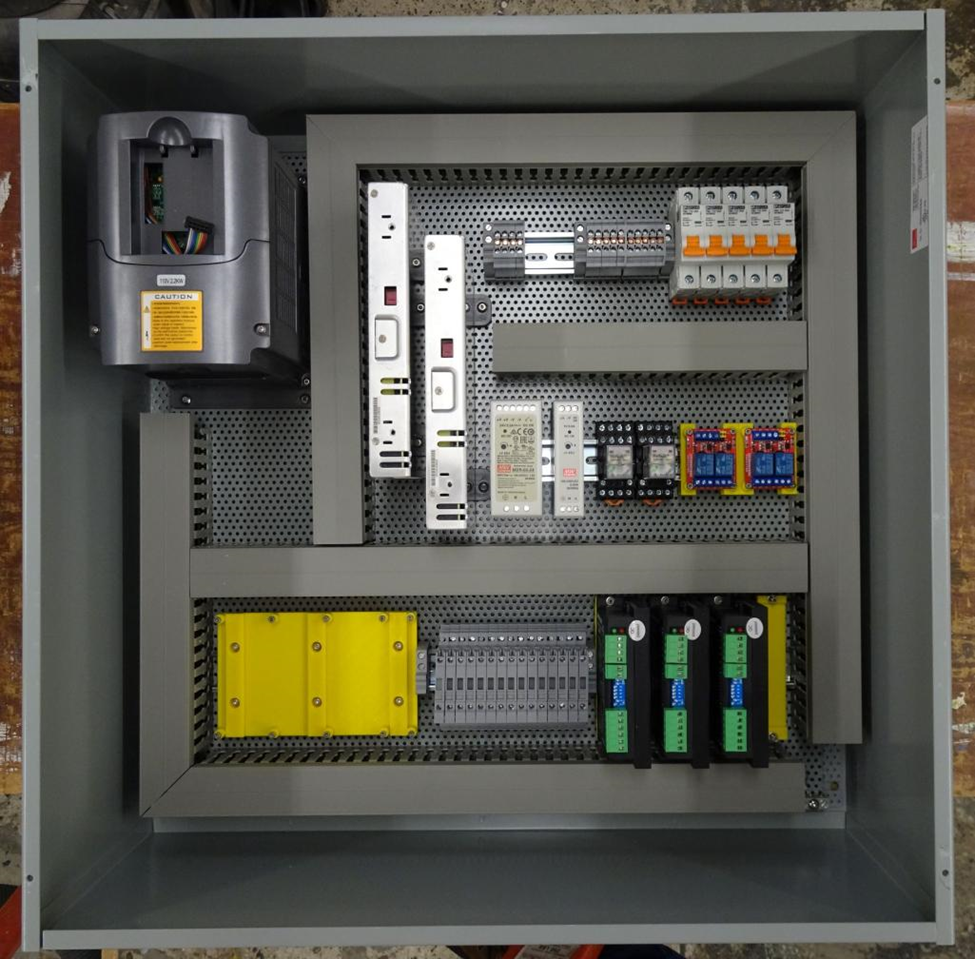
¶ Positioning the parts inside the enclosure
There are several factors that need to be taken into account for positioning the components.
- put parts together that you need to connect together
- separate high voltage (120/240V) and low voltage (48/36/24/12/5V) parts
- separate noisy parts from sensitive parts (see ->EMI)
- spacing for VFD: check your manual. HuanYang VFD requires vertical mounting with 50mm to the sides, 120mm top and bottom
- Ventilation: The enclosure ventilation should work with and not against the VFD fan. It is recommended to create a draft over the stepper drivers, as these can get quite hot.
- space for cable channels: Cable channels keep everything ordered and nobody sees the mess inside if the cover is on.
- optionally: leave some space for later additions, like an additional stepper driver for a 4th axis or a mesa upgrade instead of the bob.
¶ Here are some examples of enclosures:
¶ EMI
Some of the parts create electromagnetic interferences which can disturb other parts. Simplified, high frequencies at high voltages or currents create most emi, this is mainly the VFD and less important the stepper drivers. Low voltage control signals like the step and dir signals from the parallel port (bob or mesa) are sensitive to emi. Emi issues are a bit erratic, some people get away with things others don't. Sometimes it is difficult to say if a problem is caused by EMI, like infrequent skipped steps or triggered endstops. Here are some tips to avoid problems:
- Keep distance between noisy and sensitive parts
- Don't run those cables parallel to each other, crossing is much less a problem
- Use shielded cables. For the VFD a double shielded cable is required. Normal shielding is recommended for the stepper motor cables and signal cables. For the latter you can use cat5/6 cable (see wiring).
- Use twisted pairs if signal lines are not grounded
- central ground point: Grounding should be done at a central point or in a star topology. Don't create ground loops. Don't forget to ground the enclosure.
¶ Cables inside the enclosure
- Inside the enclosure you can use solid wire. Otherwise you often would need ferrules.
- To route the wires outside the enclosure you have several options:
- cable glands: Simple, provides strain relief and sealing
- cable grommet:seal, needs additional strain relief but is cheap
- plugs: more costly, very practical for transporting and changing things later
- aviation connectors: Practical for transporting, but a pain to solder depending on your skills