¶ Summary
Short summary of this step
¶ Prep
¶ Hardware Needed:
- X-Axis gantry beam
- (2) HGR20 rail
- center punch
- ~6mm diameter marking tool (if used gently a 6 mm drill bit and a hammer can be used or a center punch with a compatible spacer)
- drill
- M4.2 drill bit
- M5 tap bit
- M5x20 socket head cap screws
¶ Printed Parts Needed
- Center Line Marker Tool
¶ When complete, verify
¶ Build Steps:
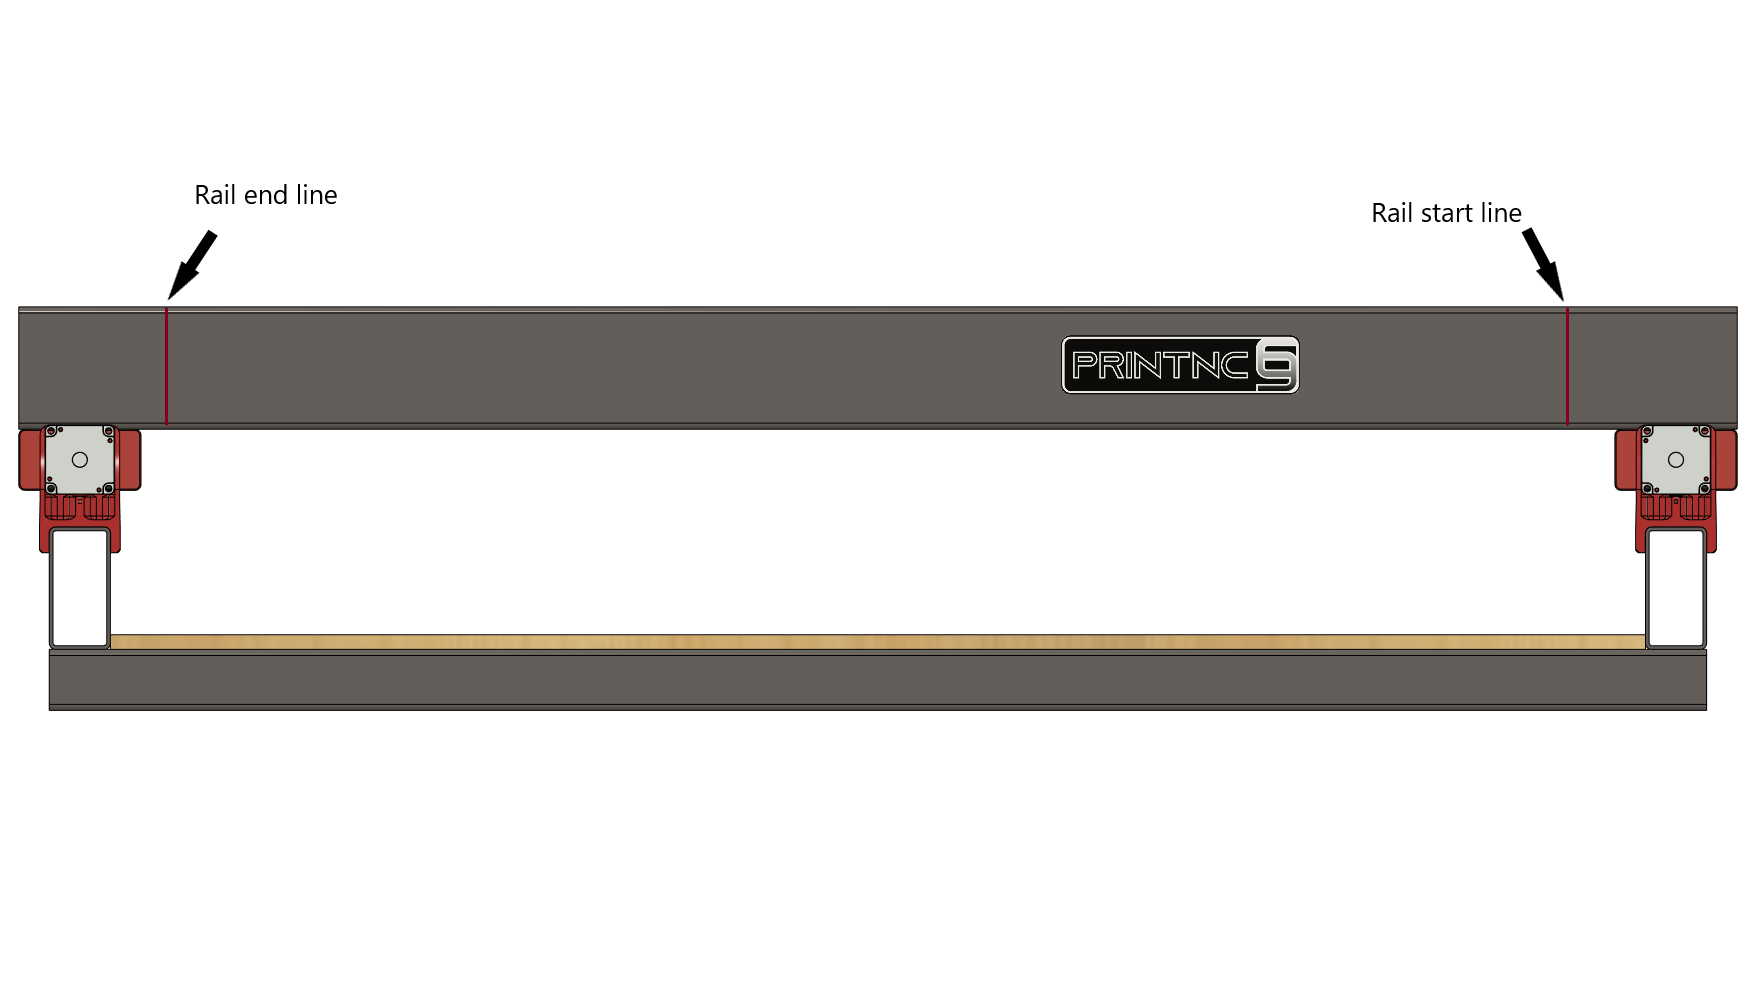
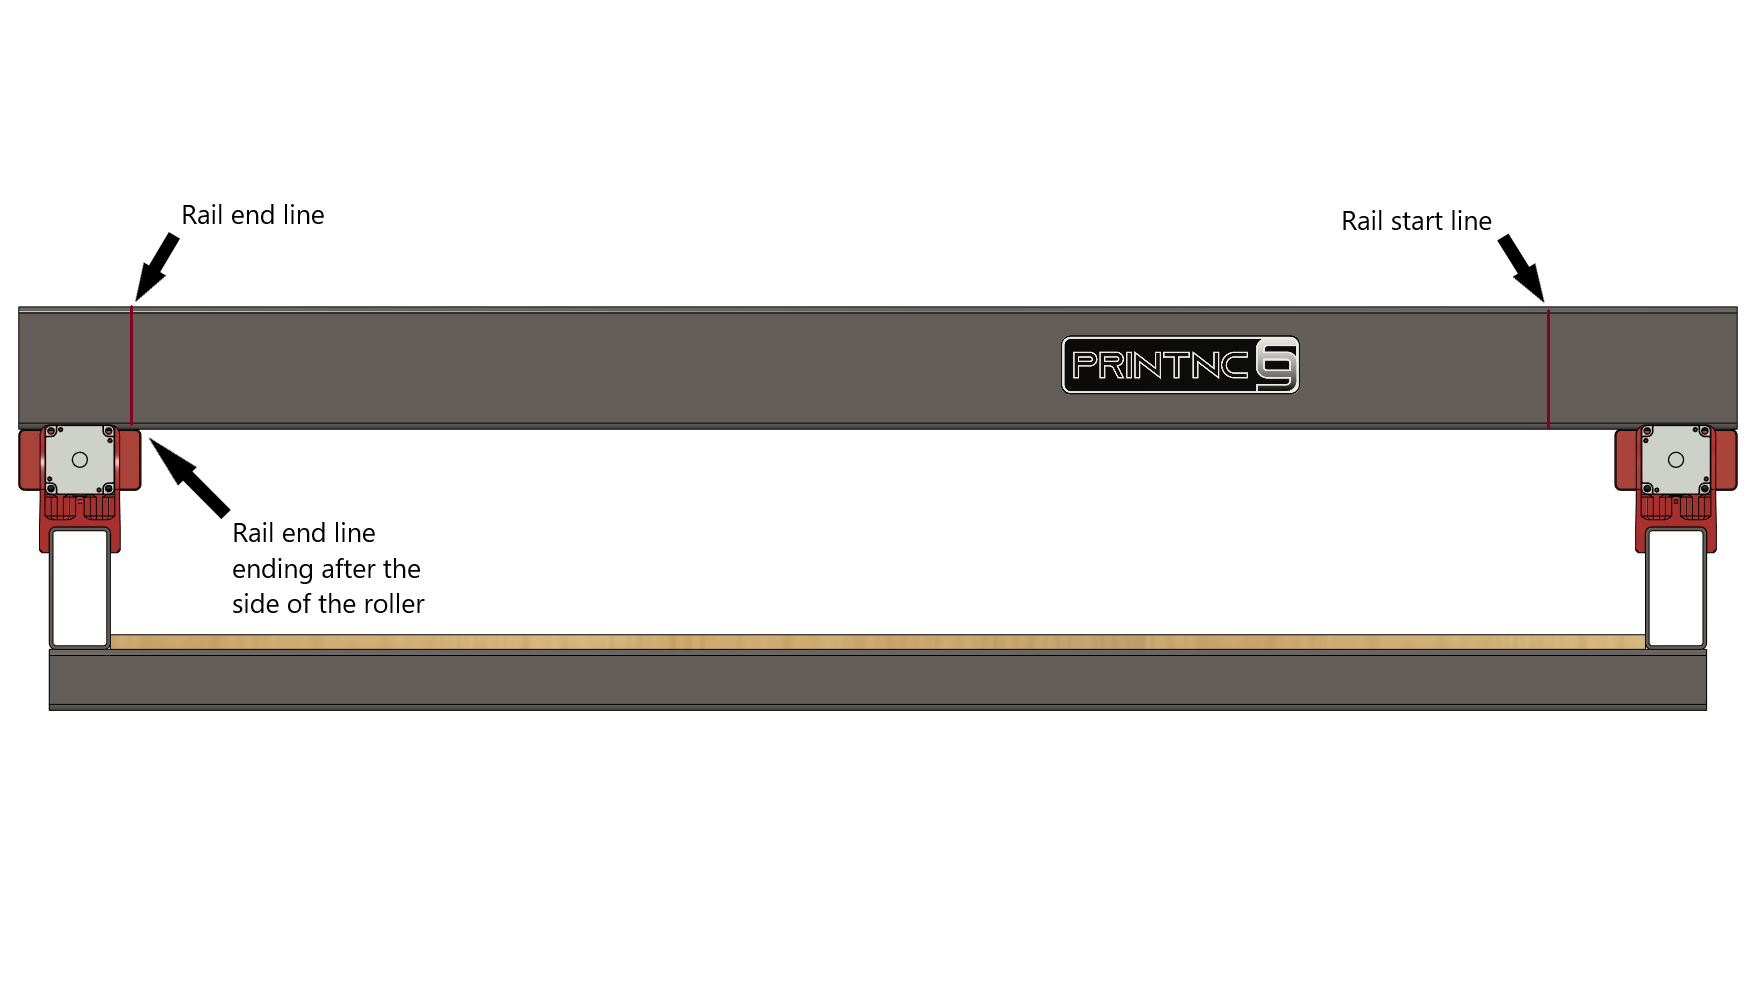
- Put back you X gantry on both Y rollers. Align each side of the X gantry to each Y roller side. Now check the rail start and end line.
Normally, both lines should be located between the Y roller internal sides.

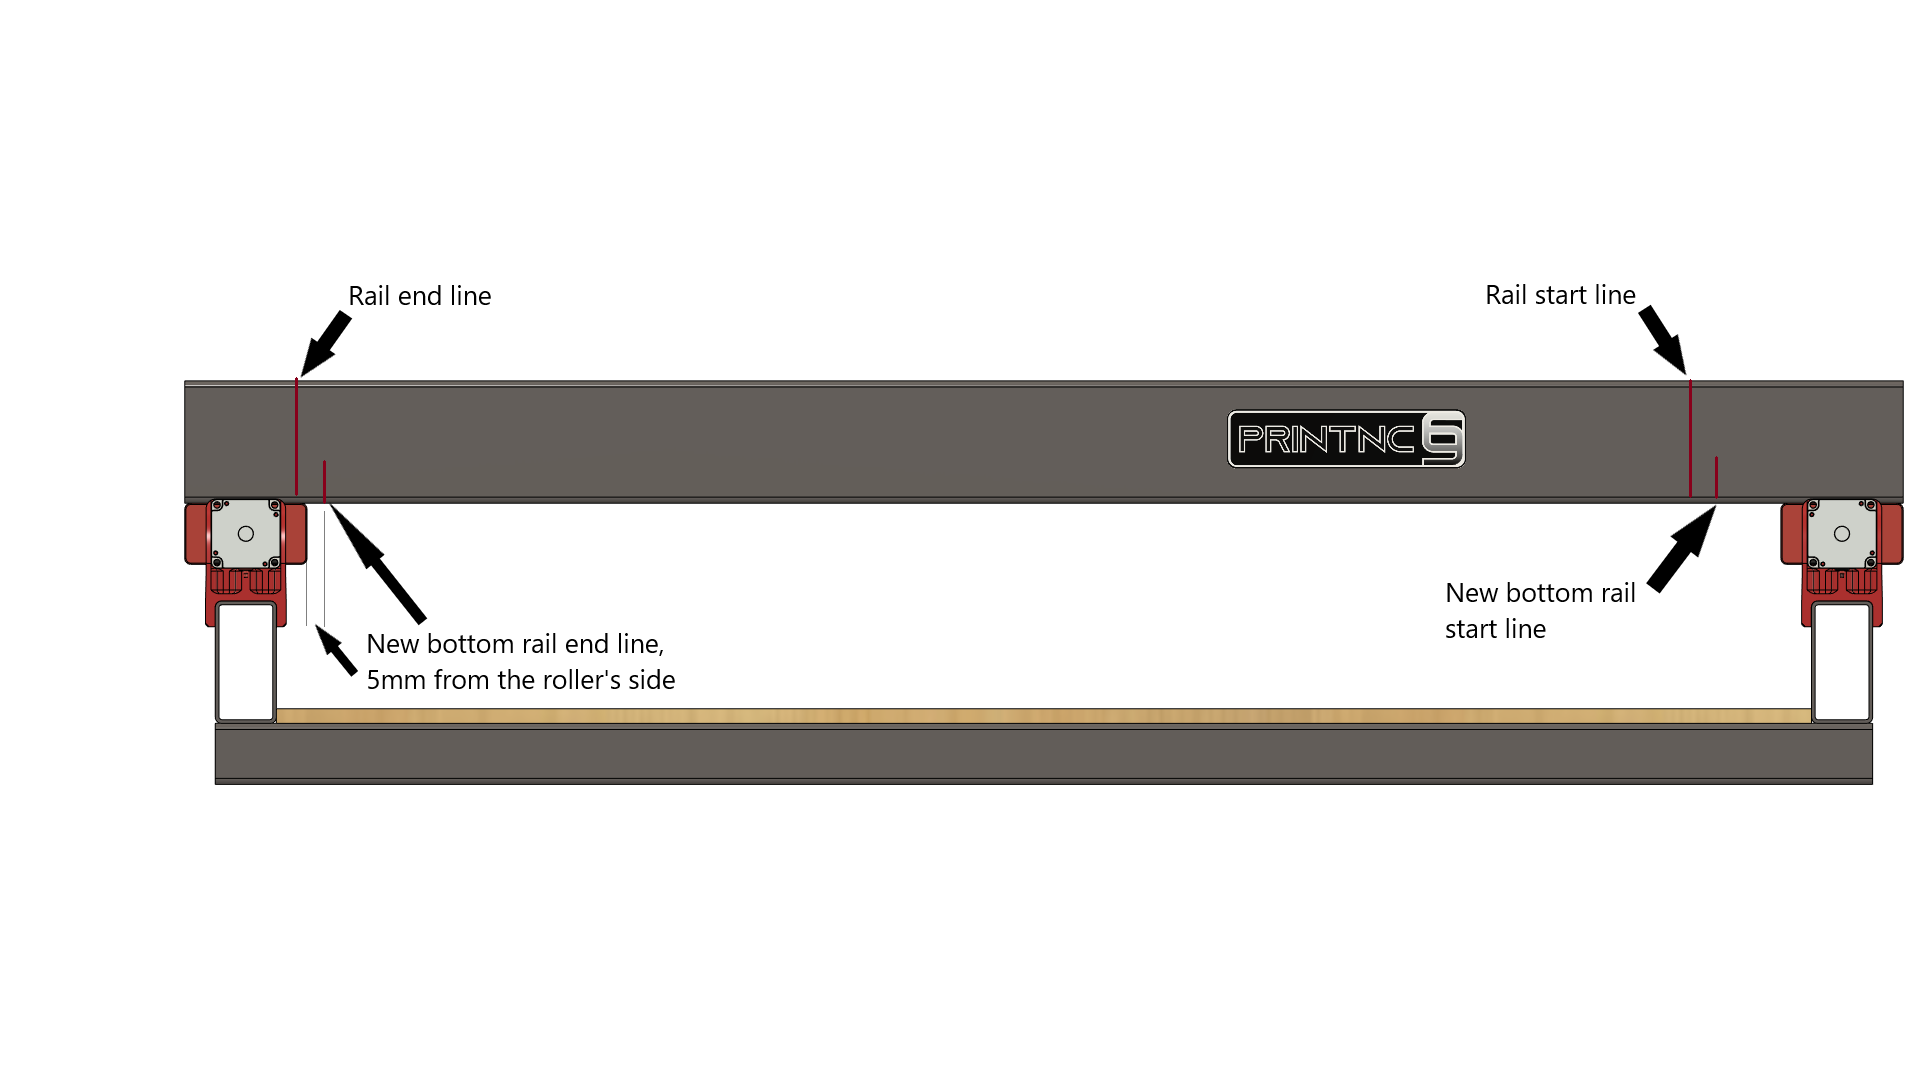
If one line is located above a Y roller, that means your bottom rail will collide with the Y roller in that position.

If that's the case, make a new end mark on the bottom of the tube, 5mm away from the Y roller, then position a rail on this new mark and make a new line for new start of the rail. This will be the new position for your bottom rail.

The top and bottom rail can be slightly misaligned, as long as it's only a few millimeters.
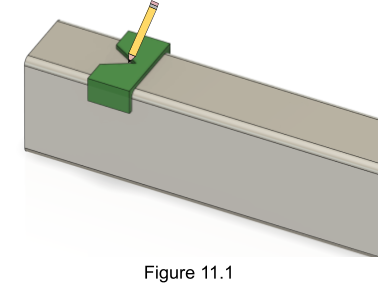
- Position the Center Line Marker Tool on the top face of the gantry beam as shown in Figure 11.1.

- Place a pencil or other marking tool at the center of the v shaped groove on the Center Line Marker Tool and hold it there securely.
- Run the Center Line Marker Tool down the length of the beam while using the marking tool to mark the center. Measure your centerline at several places to ensure it is indeed properly centered.
- Flip the beam over and repeat the previous 3 steps for the underside of the gantry beam.
- Position HGR20 rail on the top face within the marks made in step 10.11.
- Ensure the HGR20 rail is centered on the X-Axis gantry beam. Use the center line to validate.
- Using the 6mm marking tool, mark the center of the first and last holes in the HGR20 rail.
- Flip the beam over and repeat the last 3 steps for the underside of the gantry beam. Do NOT use the same rail as the three previous steps, as distance between the rail's side and the start / stop holes can vary from one rail to another. Also, if you have made new marks for the bottom rail, make sure to use them.
- Drill the points marked in the last 2 steps on both sides of the gantry beam with a 4.2 mm bit.
- Thread the holes made in the previous step with an M5 tap bit.
- Remount the top HGR20 rail and install M5x20mm bolts into the holes made in the previous step.
- Using the bolts installed above as soft anchors, mark the remaining mounting holes on the HGR20 rail. Ensure the rail maintains centered and positioned correctly throughout the entire marking process.
- Remove the bolts and dismount the HGR20 rail again.
- Drill the points marked in step 11.12 on both sides of the gantry beam with a 4.2 mm bit.
- Thread the holes made in the previous step with an M5 tap bit.
- Remount the HGR20 rail and loosely install all M5x20mm bolts.
- Repeat the last 6 steps for the bottom rail.