¶ Mesa 7i96 Setup Guide
When you are setting up your Mesa board for the first time, make sure you have all of your settings in mind so you know what to input when the time is needed. This guide is to help walk you through configuration but your settings may vary.
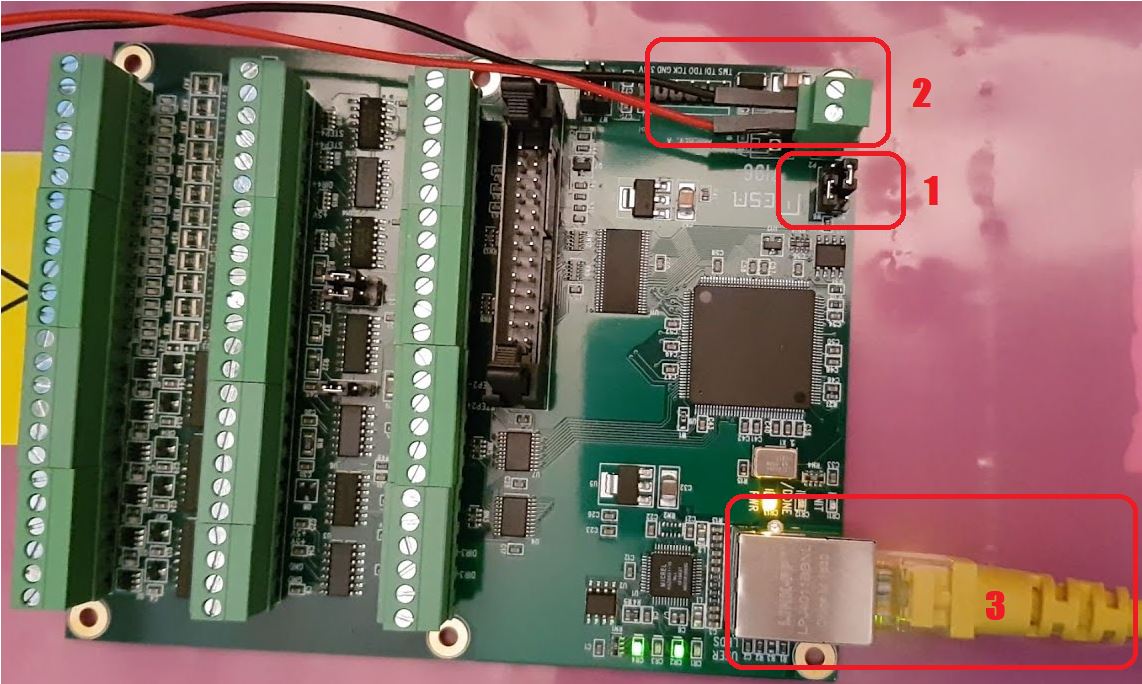
1) Set jumper W5 DOWN and jumper W6 UP so the card will use the IP address from the EEPROM 10.10.10.10. Use this rather than the default 192.168.1.121 because you don’t want the 7i96 realtime connection IP address to overlap with your local network address range.
2) Make sure your 5v power is connected properly.
3) Connect your ethernet cable to the port so we can get started. It is recommended to use a dedicated network interface to connect your computer to the Mesa board. You should use the onboard network interface for the connection, since an USB interface could be problematic.
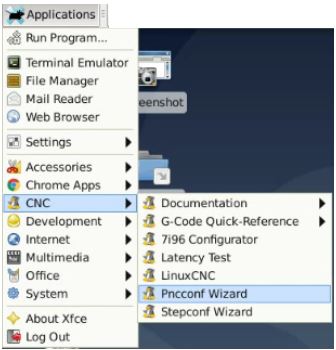
In LinuxCNC, click on your Applications button on top right of the screen and go to CNC and then Pncconf and L click to bring up the configurator.
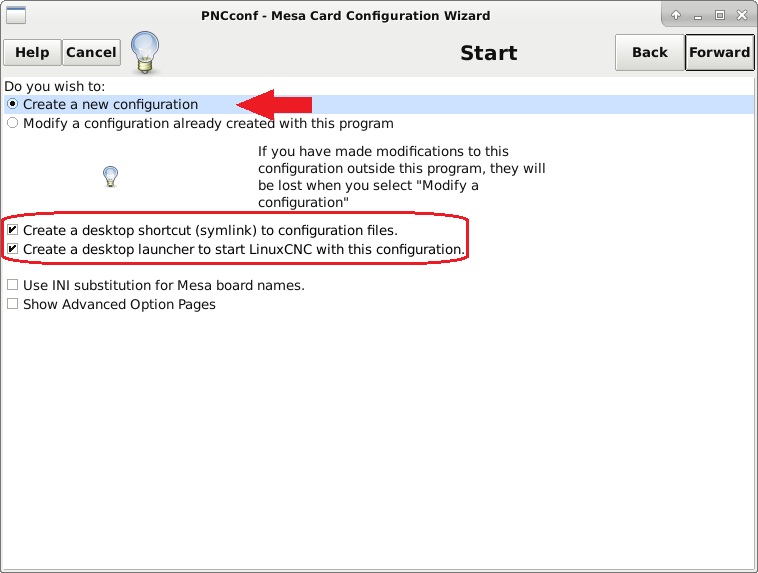
Make sure you create a new config and tick the 2 boxes that are circled so it will be easier to find your files and start your tailored version of LinuxCNC.
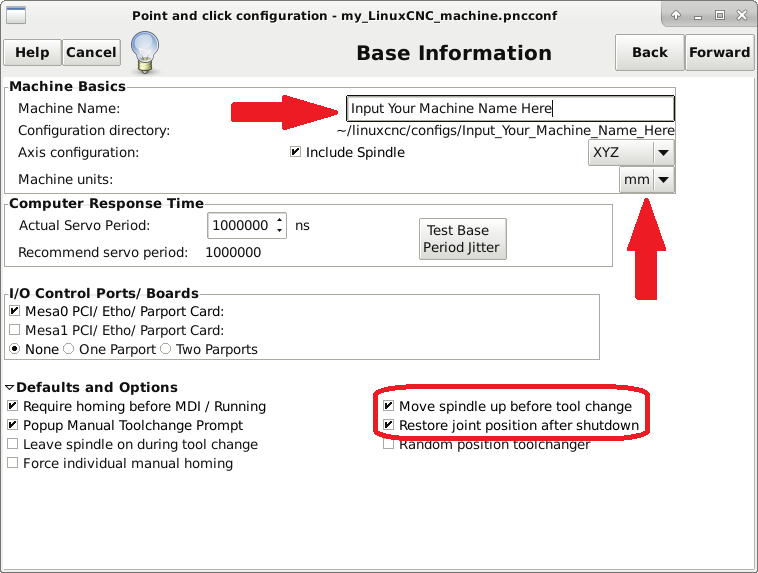
Here you can name you machine anything you want. Make sure to select inch or mm from the dropdown. Keep in mind that mm is the default of what the majority of PNC owners use. Also don't forget to tick the 2 boxes before going forward.
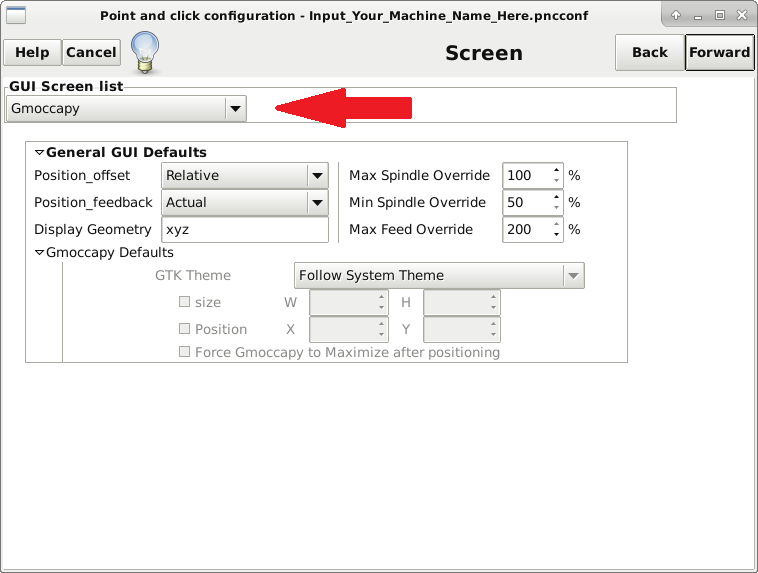
Gmoccapy is what most prefer as it has a nicer and more modern look. This is personal preference so feel free to choose what you wish.
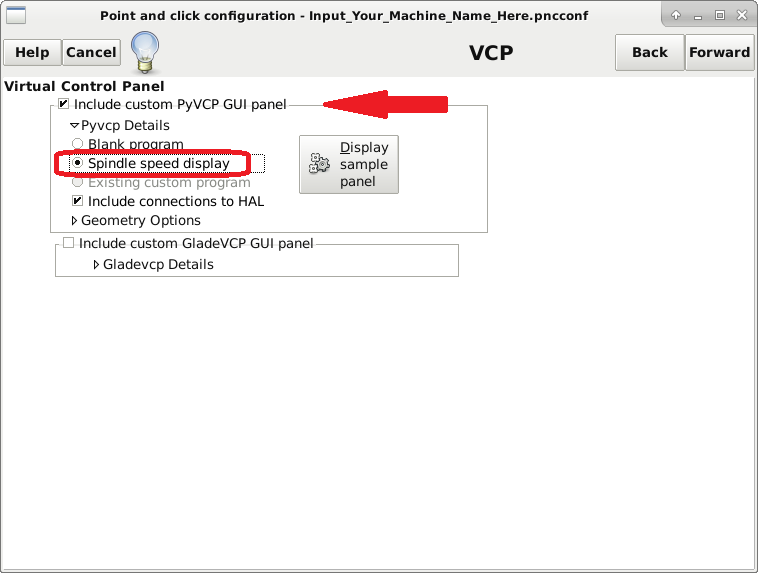
This is also up to you. With this selected, a window will show your spindle speed outside of the normal LinuxCNC window.
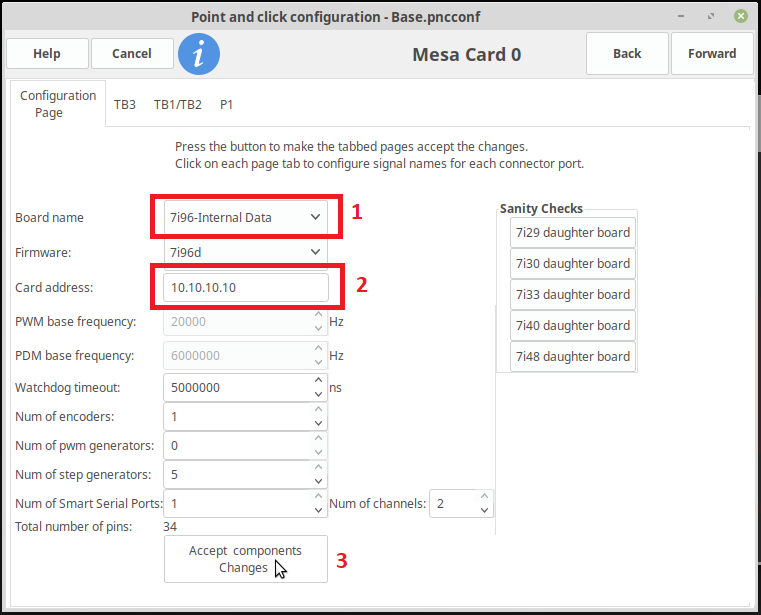
Here is where you will setup your Mesa board
- Choose your card from the selection in this box. In this case, we have the 7i96
- Make sure to set the Card address to 10.10.10.10 since we changed the jumper in the beginning of this guide.
- Click accept component changes to set these parameters so we can move to the next steps.
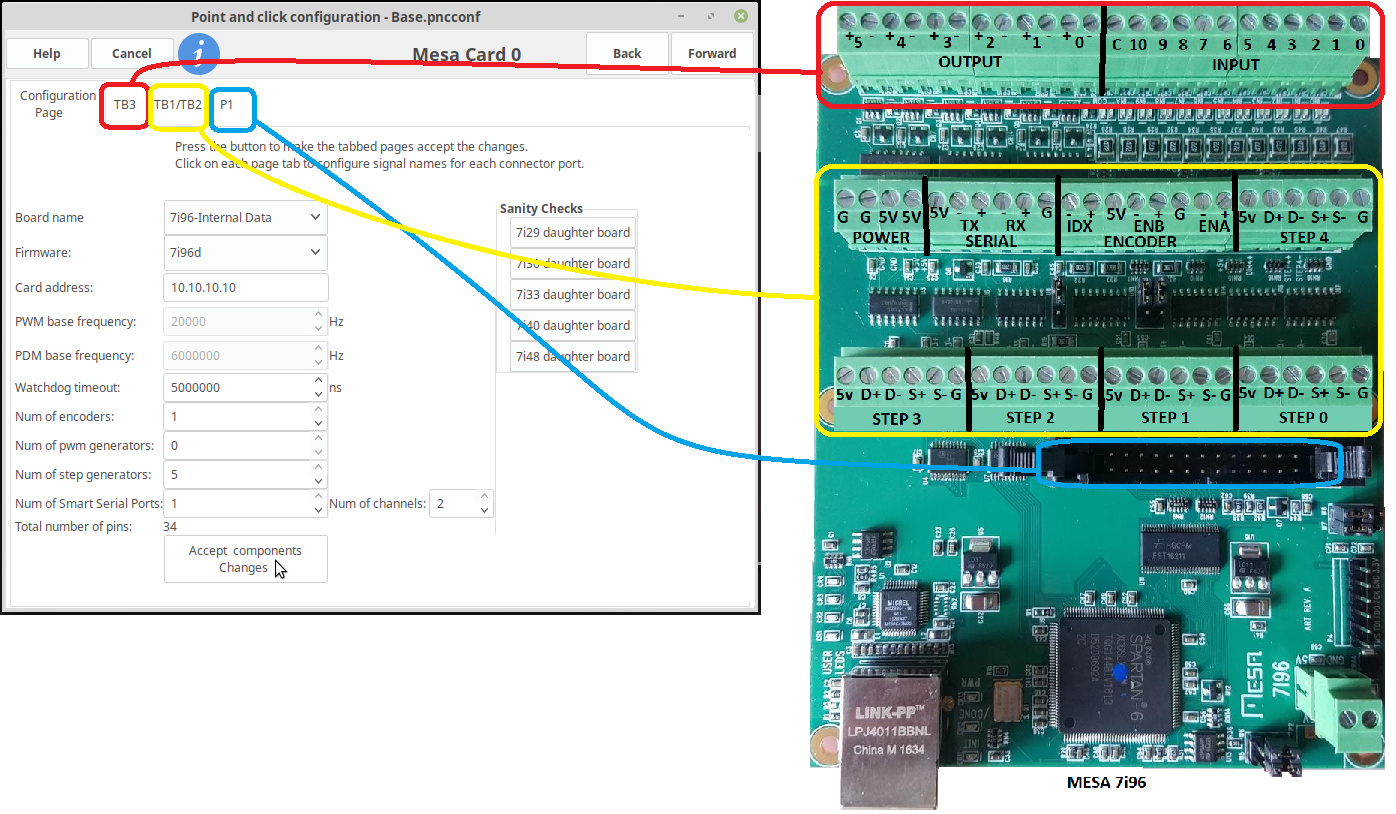
Here will give you an idea of which ports these tabs are referring to in order to help better understand your connections. Don't mind the wrong board info on this SS as it was a Google grab.
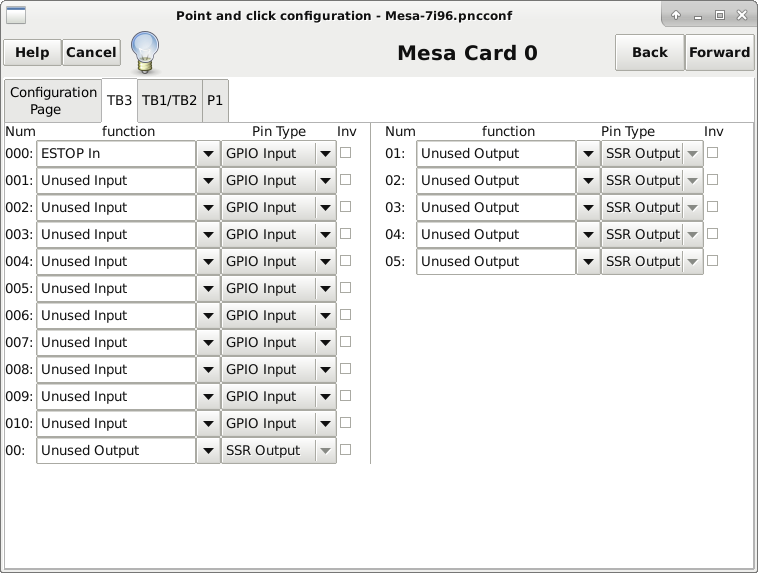
I chose to put my estop on this port. If you have other stuff you would like to add as inputs, feel free to configure them here. You can always return to this later if you need to make changes.
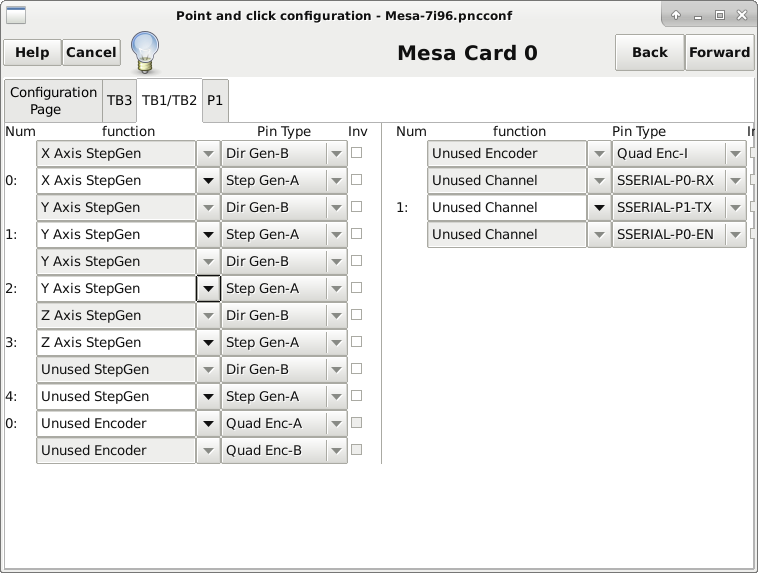
The TB1/TB2 tab is where we are going to setup our steppers. The standard config for PNC is X,Y, Y1, Z so you will need to make sure there are 2 ports configured for the 2 Y axes.
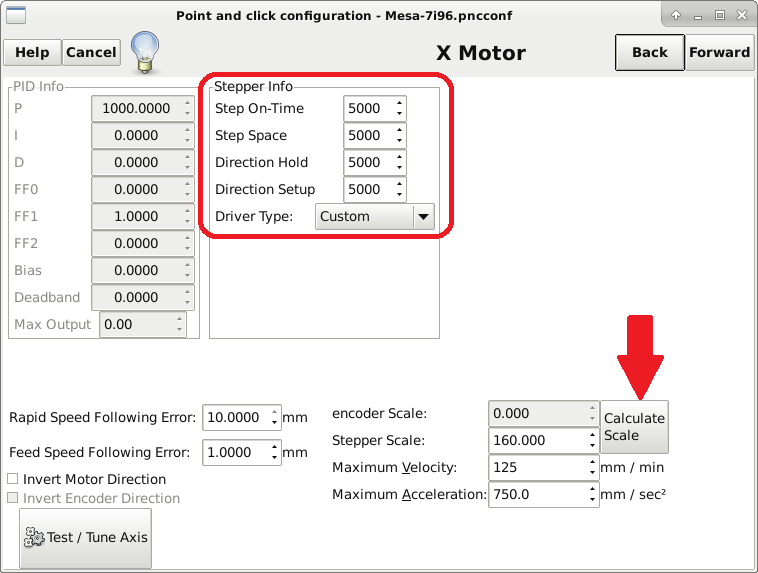
On this screen, make sure you input your Stepper info and the driver type to “Custom” if you are using the DM542 or DM556. If you have drivers that are on the drop list, chose them instead. Next, click on the Calculate Scale so we can setup the movement info. You can go here to see the values for a lot of the drivers on the market. http://wiki.linuxcnc.org/cgi-bin/wiki.pl?Stepper_Drive_Timing If your unsure about your drive timing start high like 10000 for each (or leave default) and test.
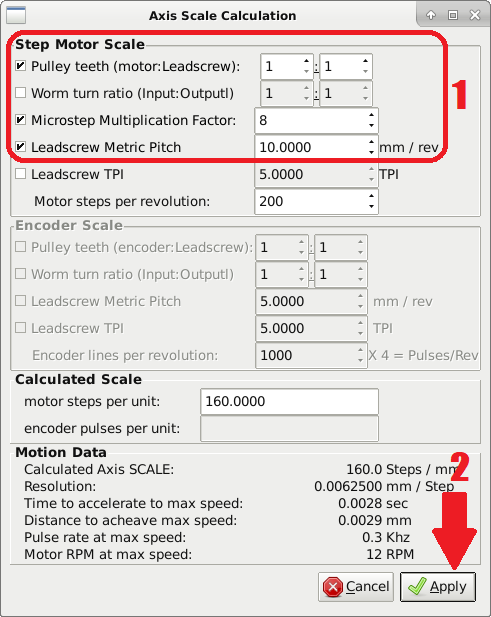
If you purchased the 1610 or 2010 Ball Screws for the Aliexpress store, these are going to be your needed values. If you want to change the Microstep factor, you have to make sure your driver is also on the same setting. Again, these are the settings I chose to go with but you can choose what you'd like. Apply settings to lock in the values. This setting will be the same for X AND Y.
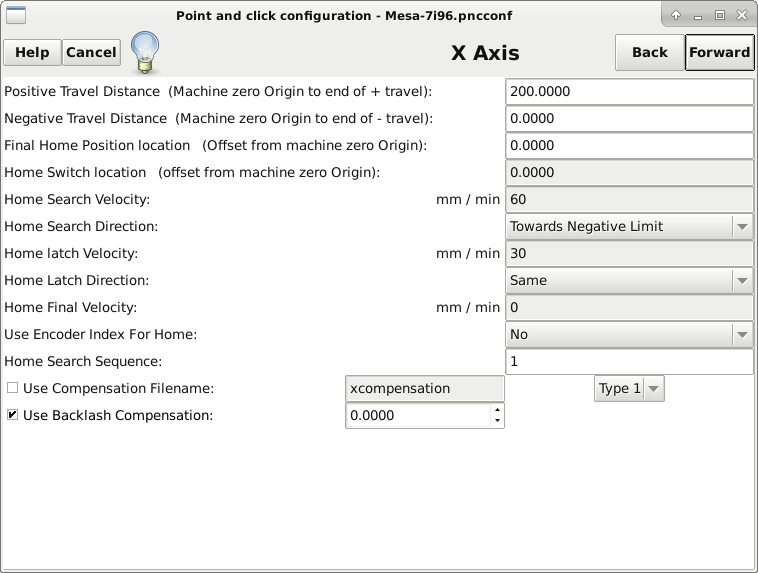
I have ticked the [Use Backlash Compensation] so I can fine tune my machine accuracy. In this screen, you will have to setup according to your machine values.
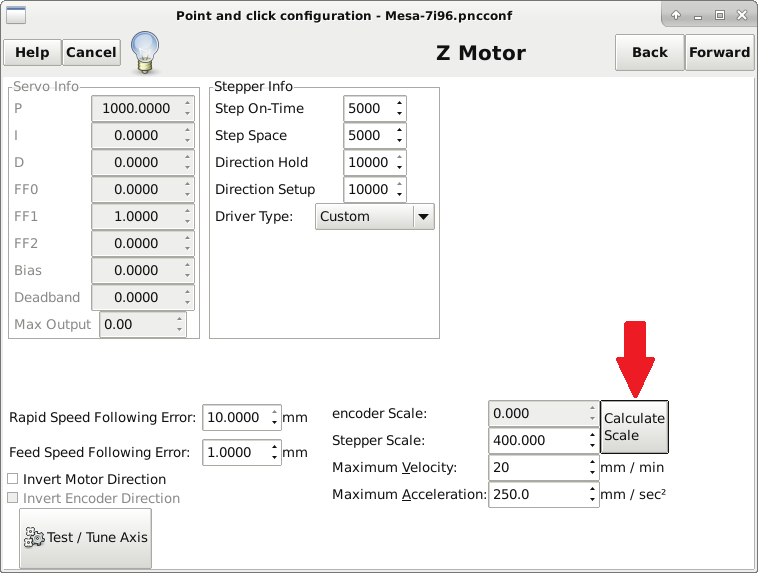
For the Z, I have left the Stepper Info area alone. Again, if you have drivers that are on the list, use those. Otherwise keep it custom. Click on Calculate Scale so we can setup our Z parameters.
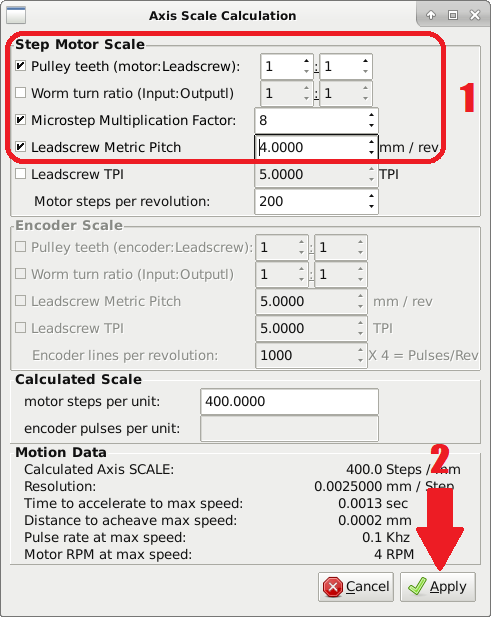
On this screen, we have different values in comparison to X/Y since we are using a 1204 Ball Screw. Make sure your Microstep Multiplication Factor is set according to what your driver is set to. Some have had issues with missed steps using anything over 4 (¼ stepping) for this setting so you will have to see what works for you. Apply settings and move forward.
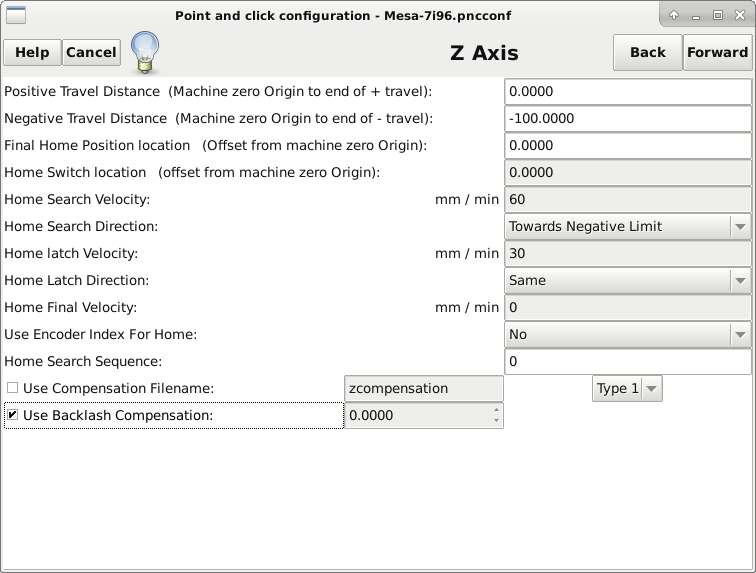
Just like with the other axes, I chose [Use Backlash Compensation] for tuning abilities. You will have to input other parameters to suit your needs.
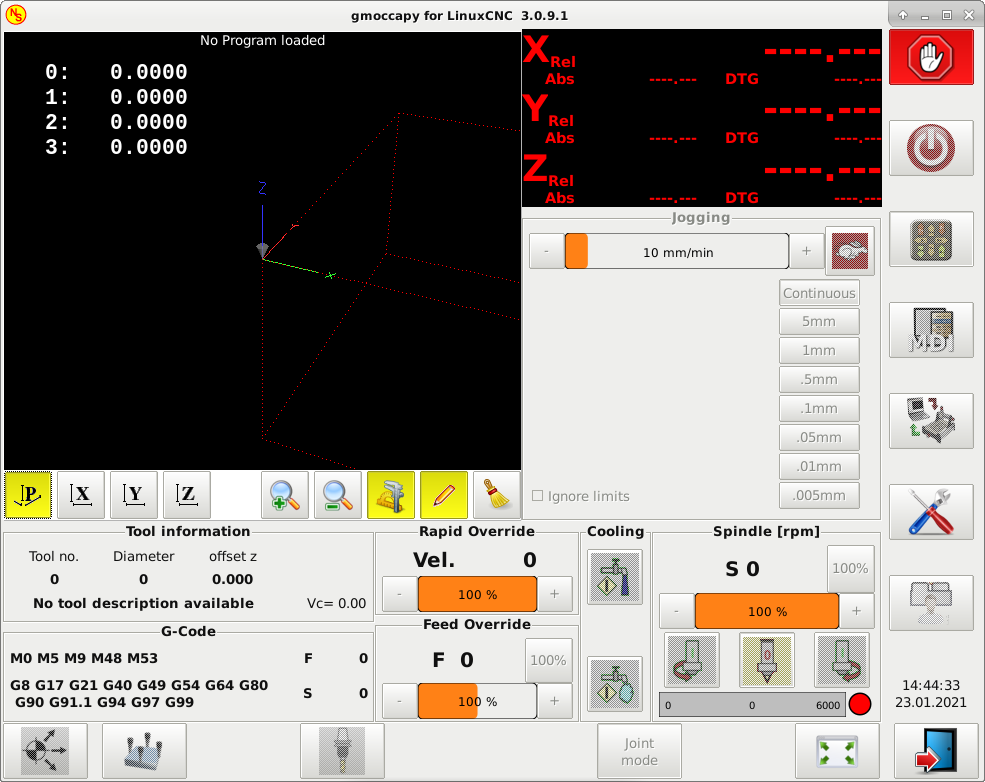
If you got this far, you are just about ready to start the rest.. Click that Done button and then Yes and open up your configured LinuxCNC!
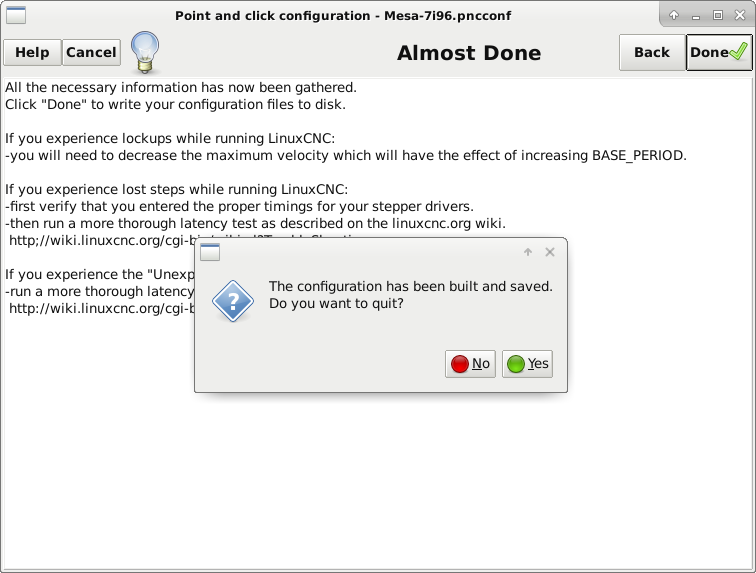
Now for all of the fine tuning that will be covered in a different guide.
Now that you are done, you can print these labels out for the connections of your newly setup Mesa controller!
Revision 1.0 covers the following Mesa cards connectors:
MESA 7i84 16 OUT 32 IN
MESA 7i87 8 ANALOG IN
MESA 7i96 ETH STEP/DIR MOTION CONTROL
MESA 7i77 ANALOG SERVO MOTION CONTROL
Just print on self-adhesive paper in 1:1 scale and laminate using cold method as instructed by the maker of the design (my.cnc.brother/plmicia).
/mesa_7i96_guide/labels_stickers_mesasockets_rev1.0.pdf
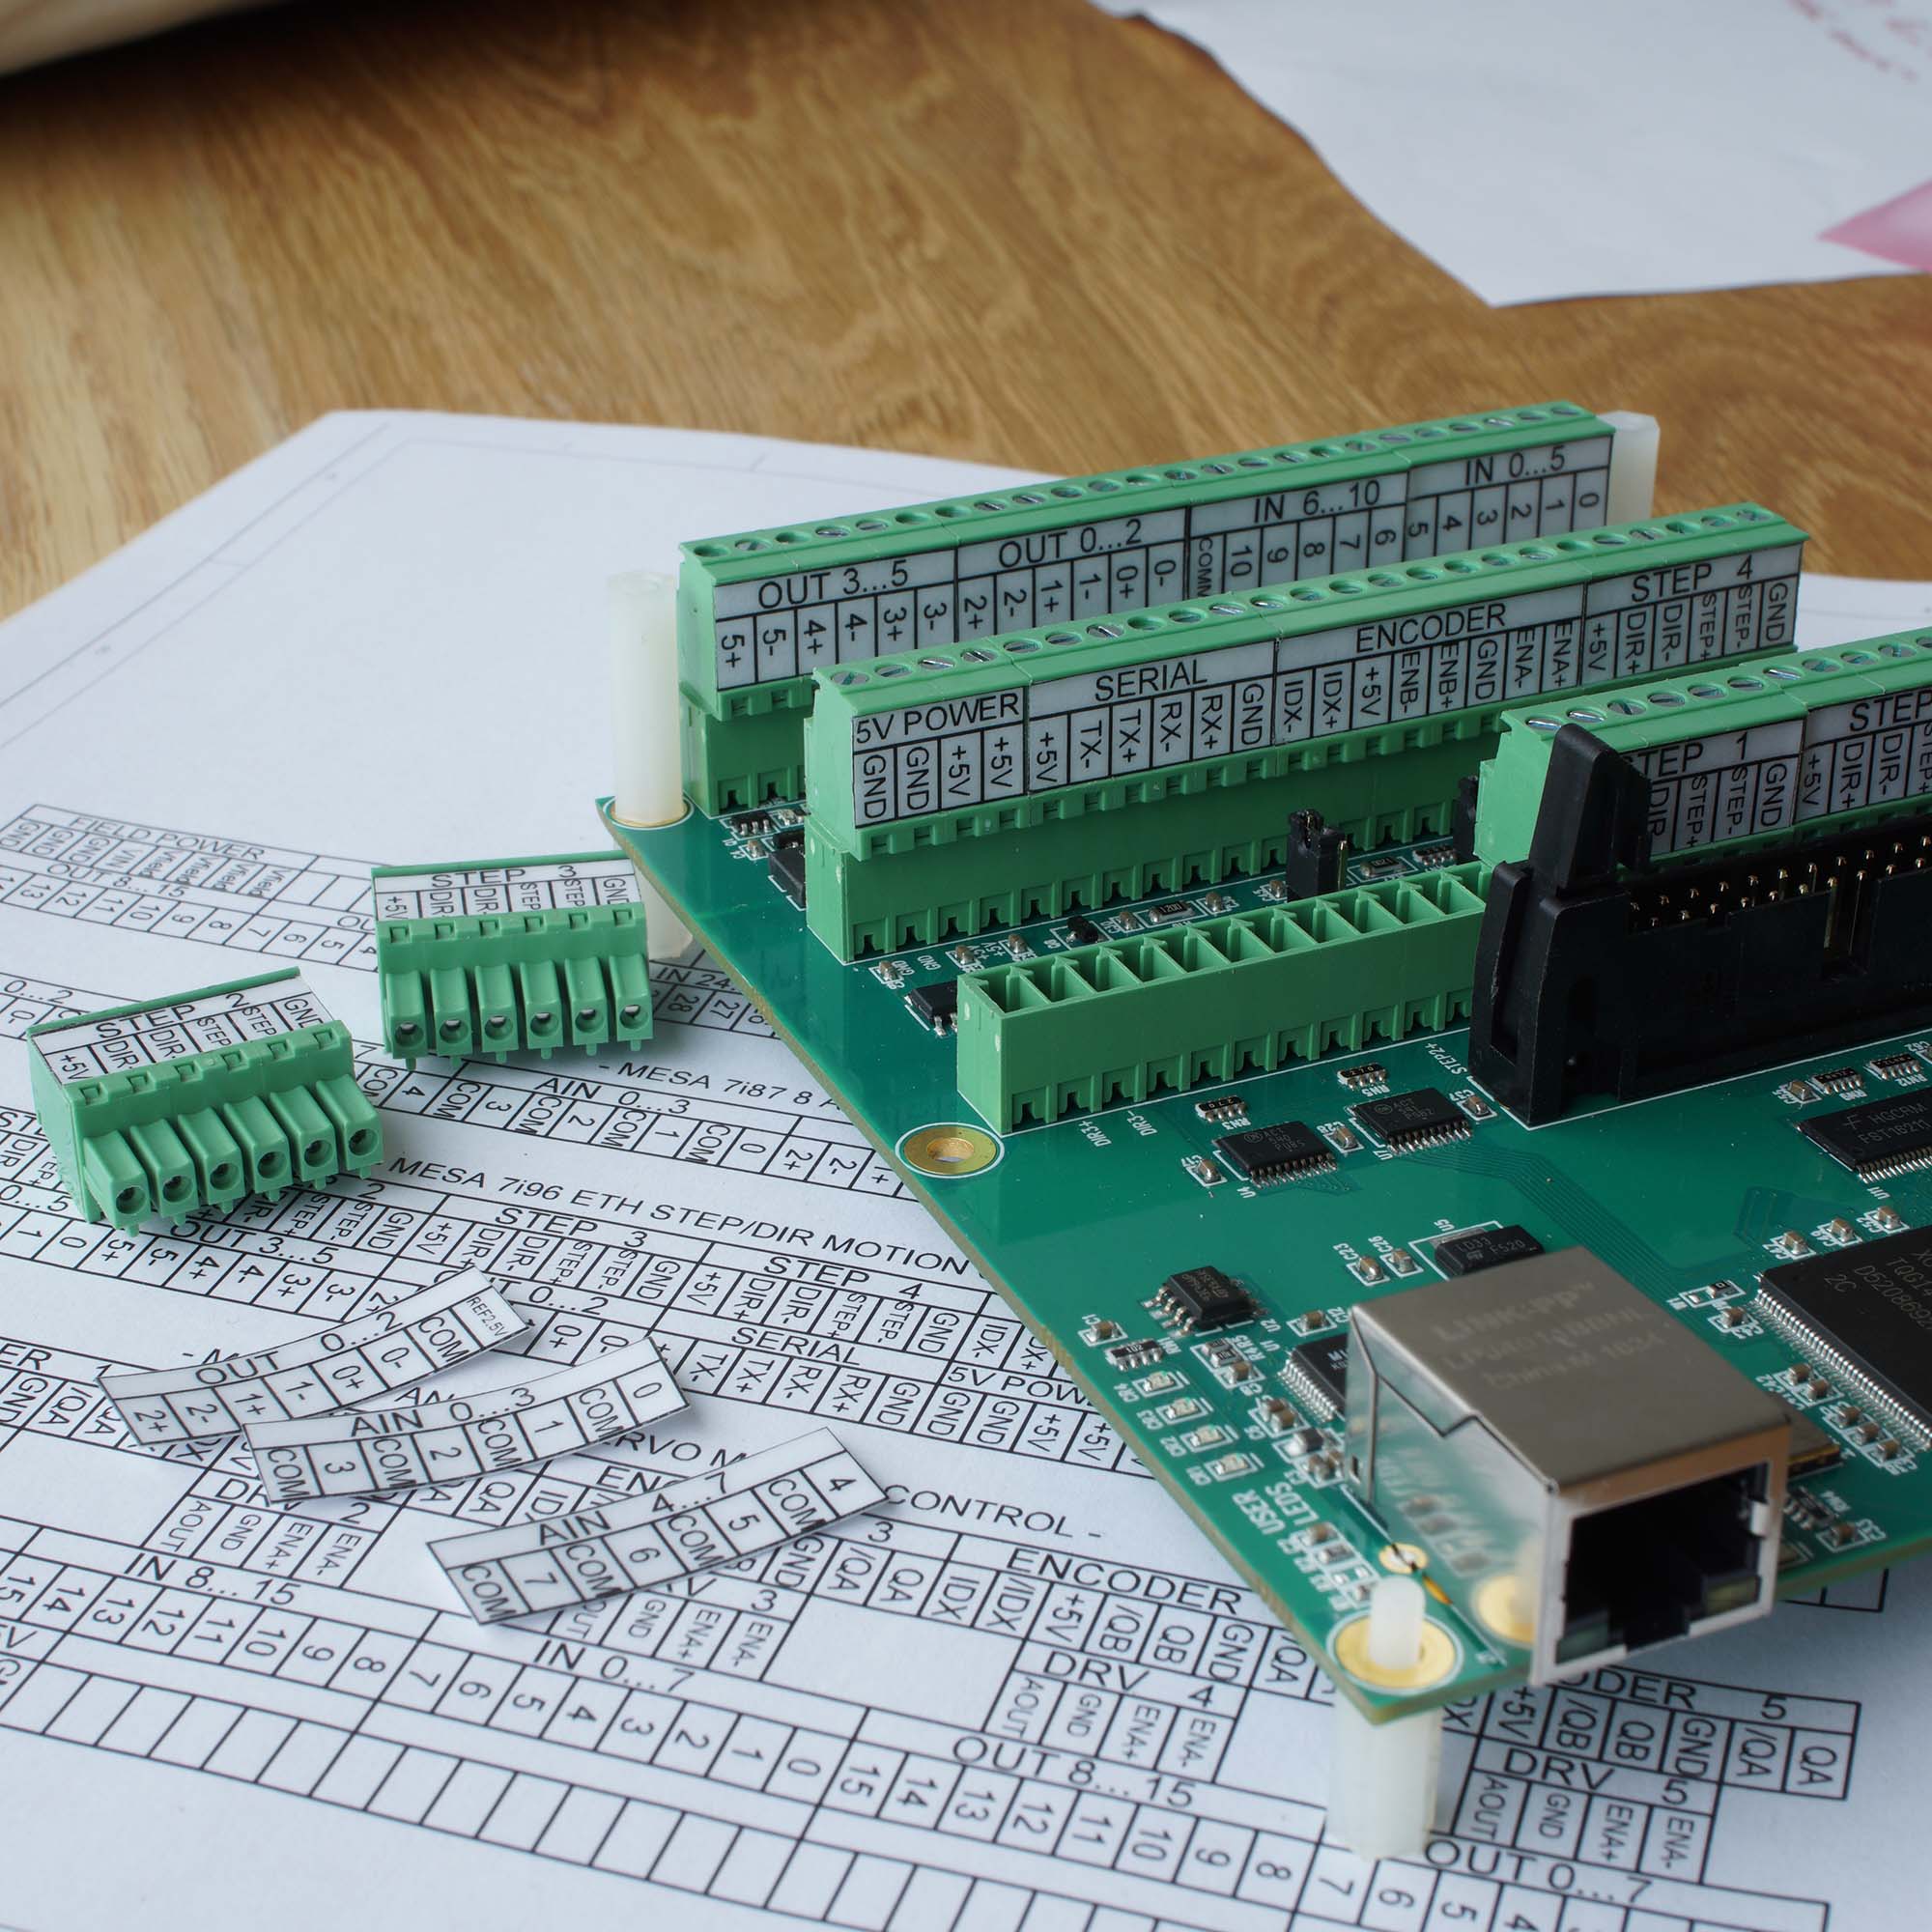
This is for the top and sides courtesy of EisbaerLars 🇩🇪 (7i76E Pictured but these are for 7i96)
/mesa_7i96_guide/20210131_mesa_7i96_labels_front_and_top.pdf
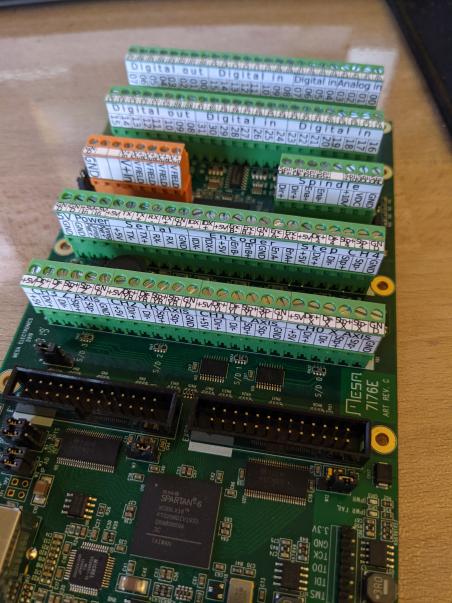
7I76E_labels can be found at:
https://github.com/bhowiebkr/PrintNC_Solidworks/tree/main/mesa/7I76E_labels
Linuxcnc installation and Probe basic screenset
Due to broken links etc it can be quite challenging to set up linuxcnc 2.8.4 (supports 7i96s), especially in combination with the probebasic screenset. here is a how-to: https://cncrouterinfo.com/article/how-to-install-linuxcnc-probe-basic/